SKG Java Community
Explore · Learn · Engage · Socialize
A community of developers in Thessaloniki, sharing knowledge and exchanging ideas around Java and beyond - Kubernetes, LLMs, AI, GraphQL, Kafka, Docker, OpenTelemetry, CI/CD, and more.
Everyone is welcome to attend, present, socialize, exchange ideas, and make new connections!
- 🎤 Submit a talk or suggest a topic
- 💡 Vote for topics in the backlog
- 💻 GitHub Repo
- 🤝 Facebook Page
- 💖 Sponsorship & Donations


Eleftherios Chrysochoidis
 LinkedIn
 GitHub
 Sessionize
Introduction
AI is rapidly becoming part of everyday applications - but how can Java developers actually use it in real-world systems?
In this hands-on workshop, we'll build an intelligent "Meetup Community Assistant" using Spring Boot, exploring how modern AI capabilities can be integrated directly into your backend services.
Starting from a simple Spring Boot application, we'll progressively evolve it into a fully capable AI agent that can understand user intent, interact with business logic, and automate workflows like event RSVPs.
What You'll Learn
- How to use Spring AI in real applications
- Integrating LLMs into Spring Boot APIs
- Structured output - getting typed Java objects from AI responses
- Function calling - letting the AI invoke your business logic
- Chat memory - maintaining conversational context
- Exposing your application via MCP (Model Context Protocol) for external integrations
About This Workshop
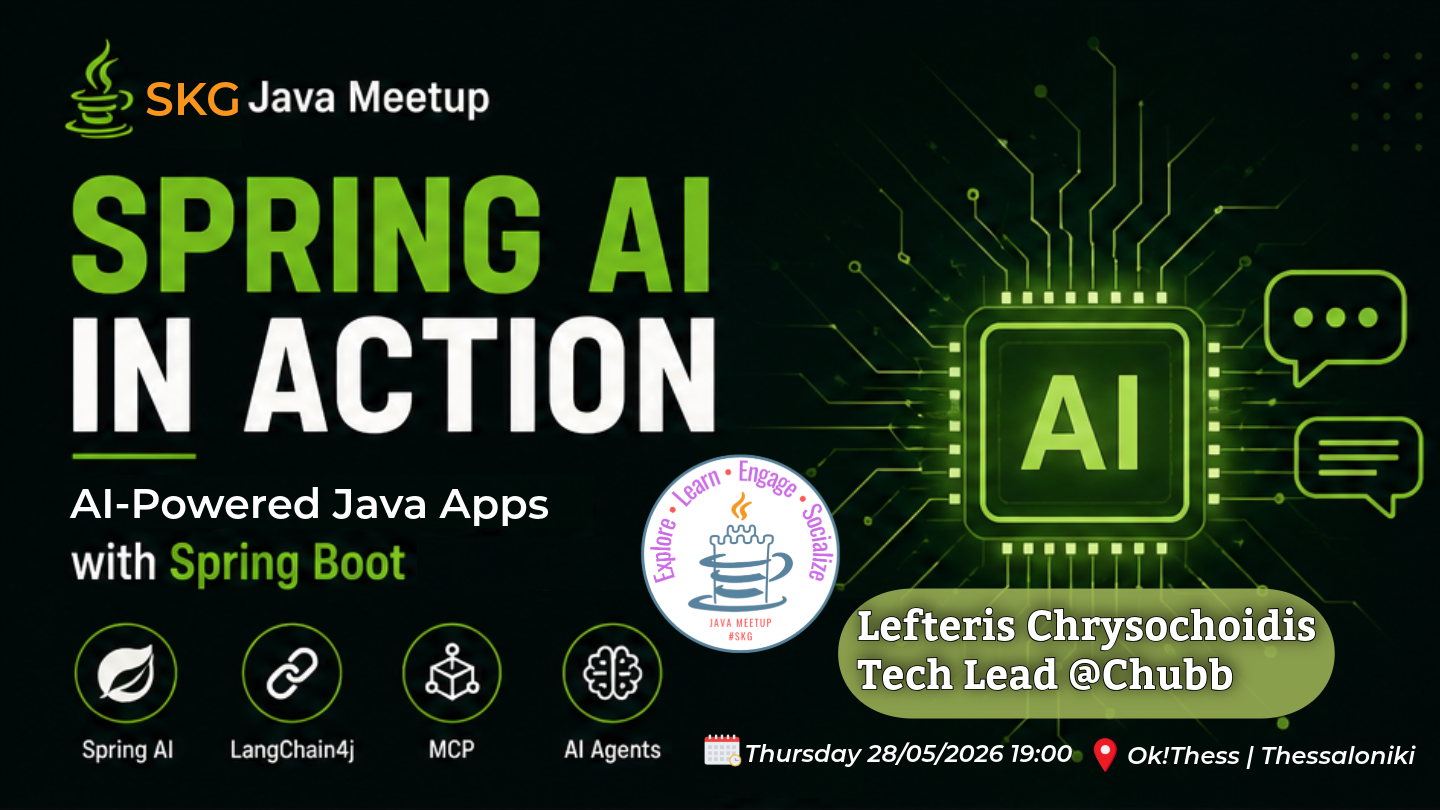
This workshop was presented at the SKG Java Meetup on Thursday, May 28, 2026 at Ok!Thess, Thessaloniki.
Basic Resources (to start with)
- Spring AI Official Documentation: spring.io/projects/spring-ai - comprehensive docs with explanations, examples, and guides. Strongly recommended reading.
- Spring AI Reference (1.0): docs.spring.io/spring-ai/reference/1.0 - the full reference documentation for Spring AI 1.0.
- Baeldung Spring AI Guide: baeldung.com/spring-ai - a great complementary resource, as is the case for all Java-related topics.
For more detailed, topic-specific resources (structured output, tool calling, chat memory, MCP, etc.), see the Wrap-up & Resources section at the end of this guide.
The complete source code for this workshop is available on GitHub: LefterisXris/spring-ai-meetup-demo. Clone it, follow along, or use it as a reference for your own projects.
Prerequisites
- Java 25 (or 21+)
- Maven 3.9+
- An IDE (IntelliJ IDEA recommended)
- An OpenAI API key (and optionally an Anthropic API key)
Step 0 Project Scaffold
In this step we generate the base Spring Boot project and verify it runs. No AI code yet - just the foundation.
Generate the Project
Go to start.spring.io and configure the project with the following settings:
| Setting | Value |
|---|---|
| Project | Maven |
| Language | Java |
| Spring Boot | 3.5.14 (latest stable) |
| Group | gr.skg.java.meetup |
| Artifact | spring-ai |
| Packaging | Jar |
| Configuration | YAML |
| Java | 25 |
Dependencies (use CTRL+B to add): Spring Web, Spring Data JPA, H2 Database, Lombok
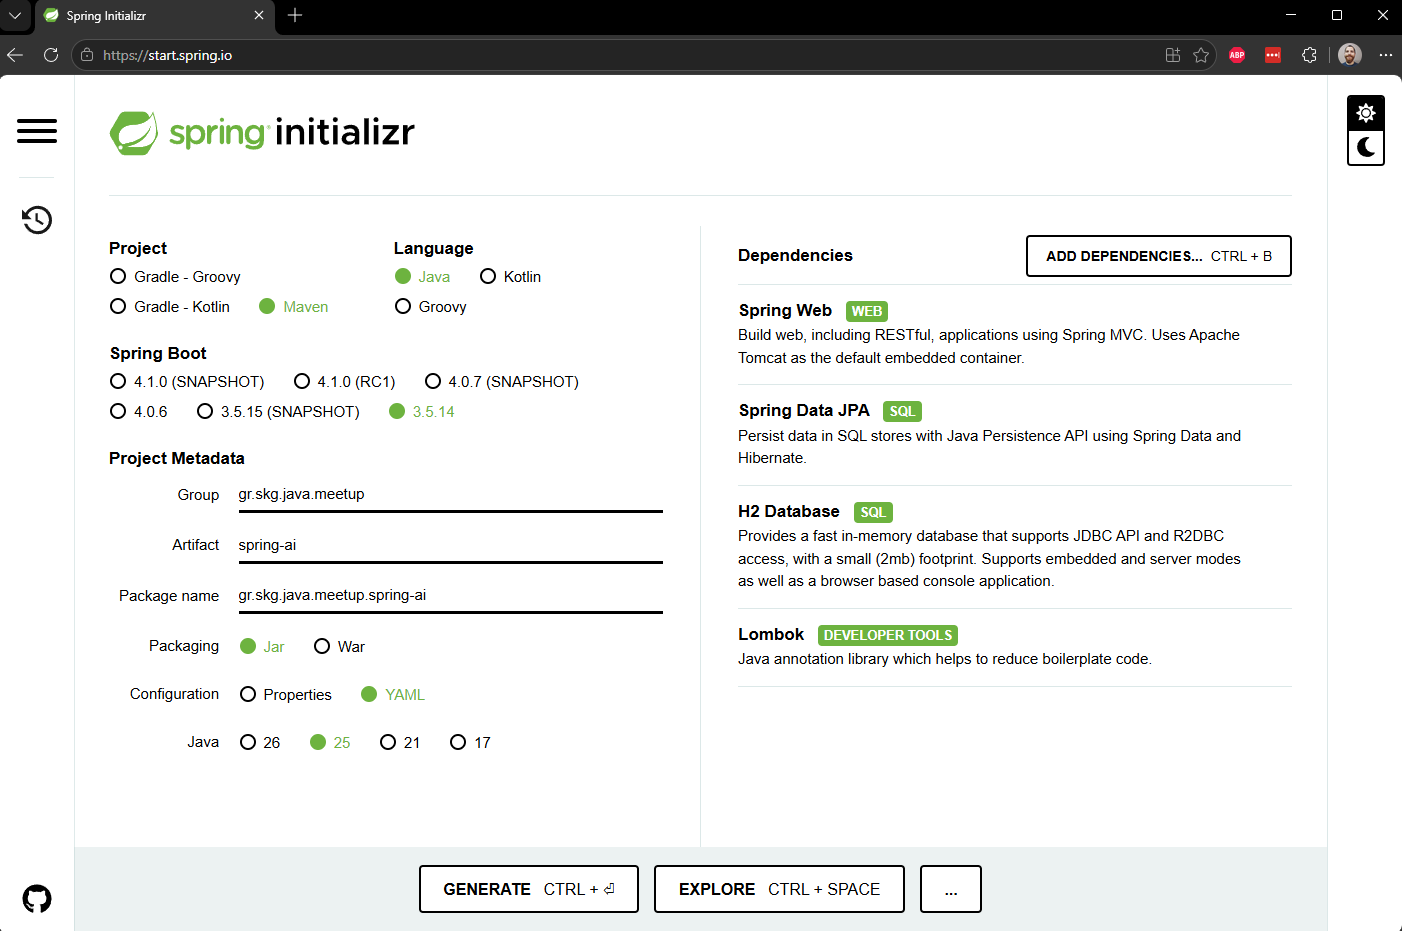
Click GENERATE (CTRL+Enter) to download the zip file.
Open the Project
Extract the downloaded zip and open it in your IDE.
If you use PowerShell and IntelliJ often, you can set up a handy alias that extracts and opens in one command. Add this function to your PowerShell profile ($PROFILE):
# idea - Extract a Spring Initializr zip and open it in IntelliJ IDEA
# Usage: idea <zip-file> [destination]
function idea {
    param(
        [string]$ZipPath,
        [string]$Dest = "C:\Development\Code"
    )
    $name = [System.IO.Path]::GetFileNameWithoutExtension($ZipPath)
    $target = Join-Path $Dest $name
    Expand-Archive -Path $ZipPath -DestinationPath $Dest
    & "idea64.exe" $target
    Remove-Item $ZipPath
}
idea .\spring-ai.zip - one command to extract and openVerify It Works
Run the main class SpringAiApplication. Check the console for:
Started SpringAiApplication in 4.362 seconds (process running for 5.32)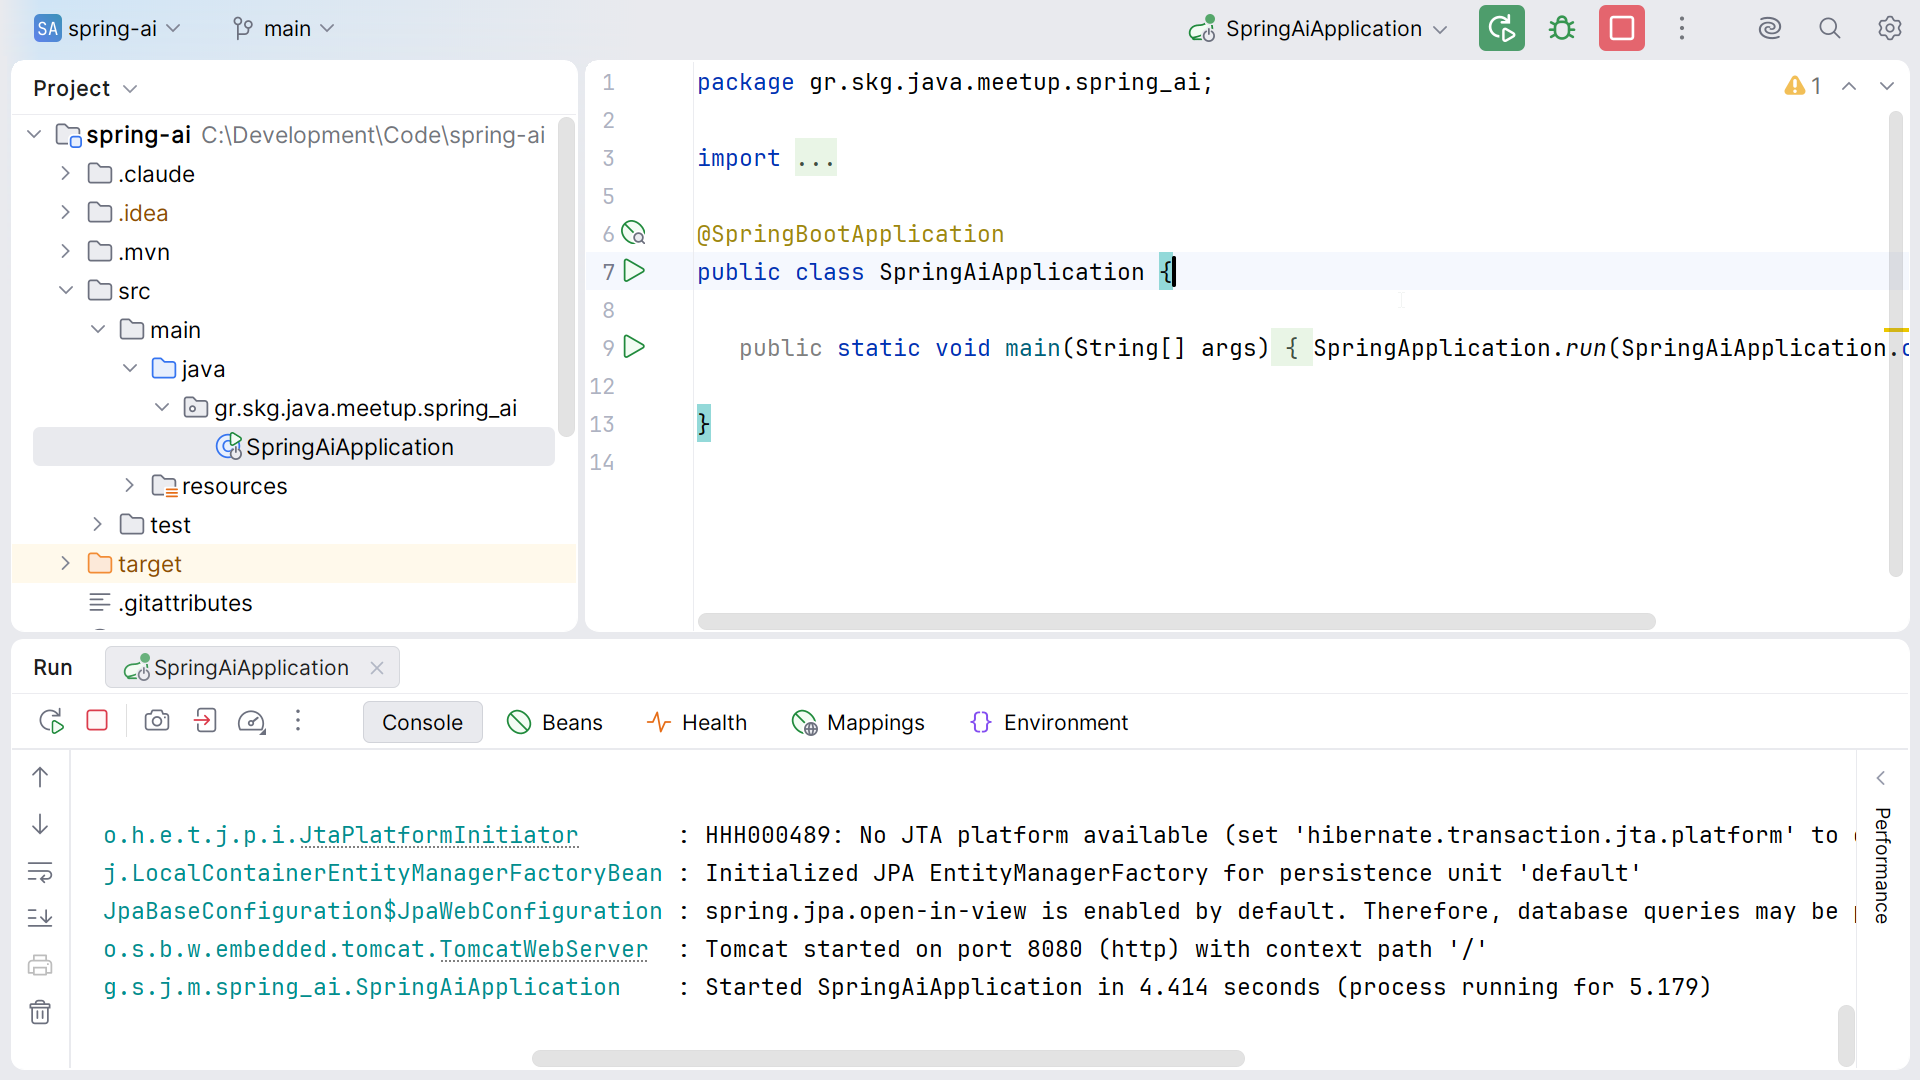
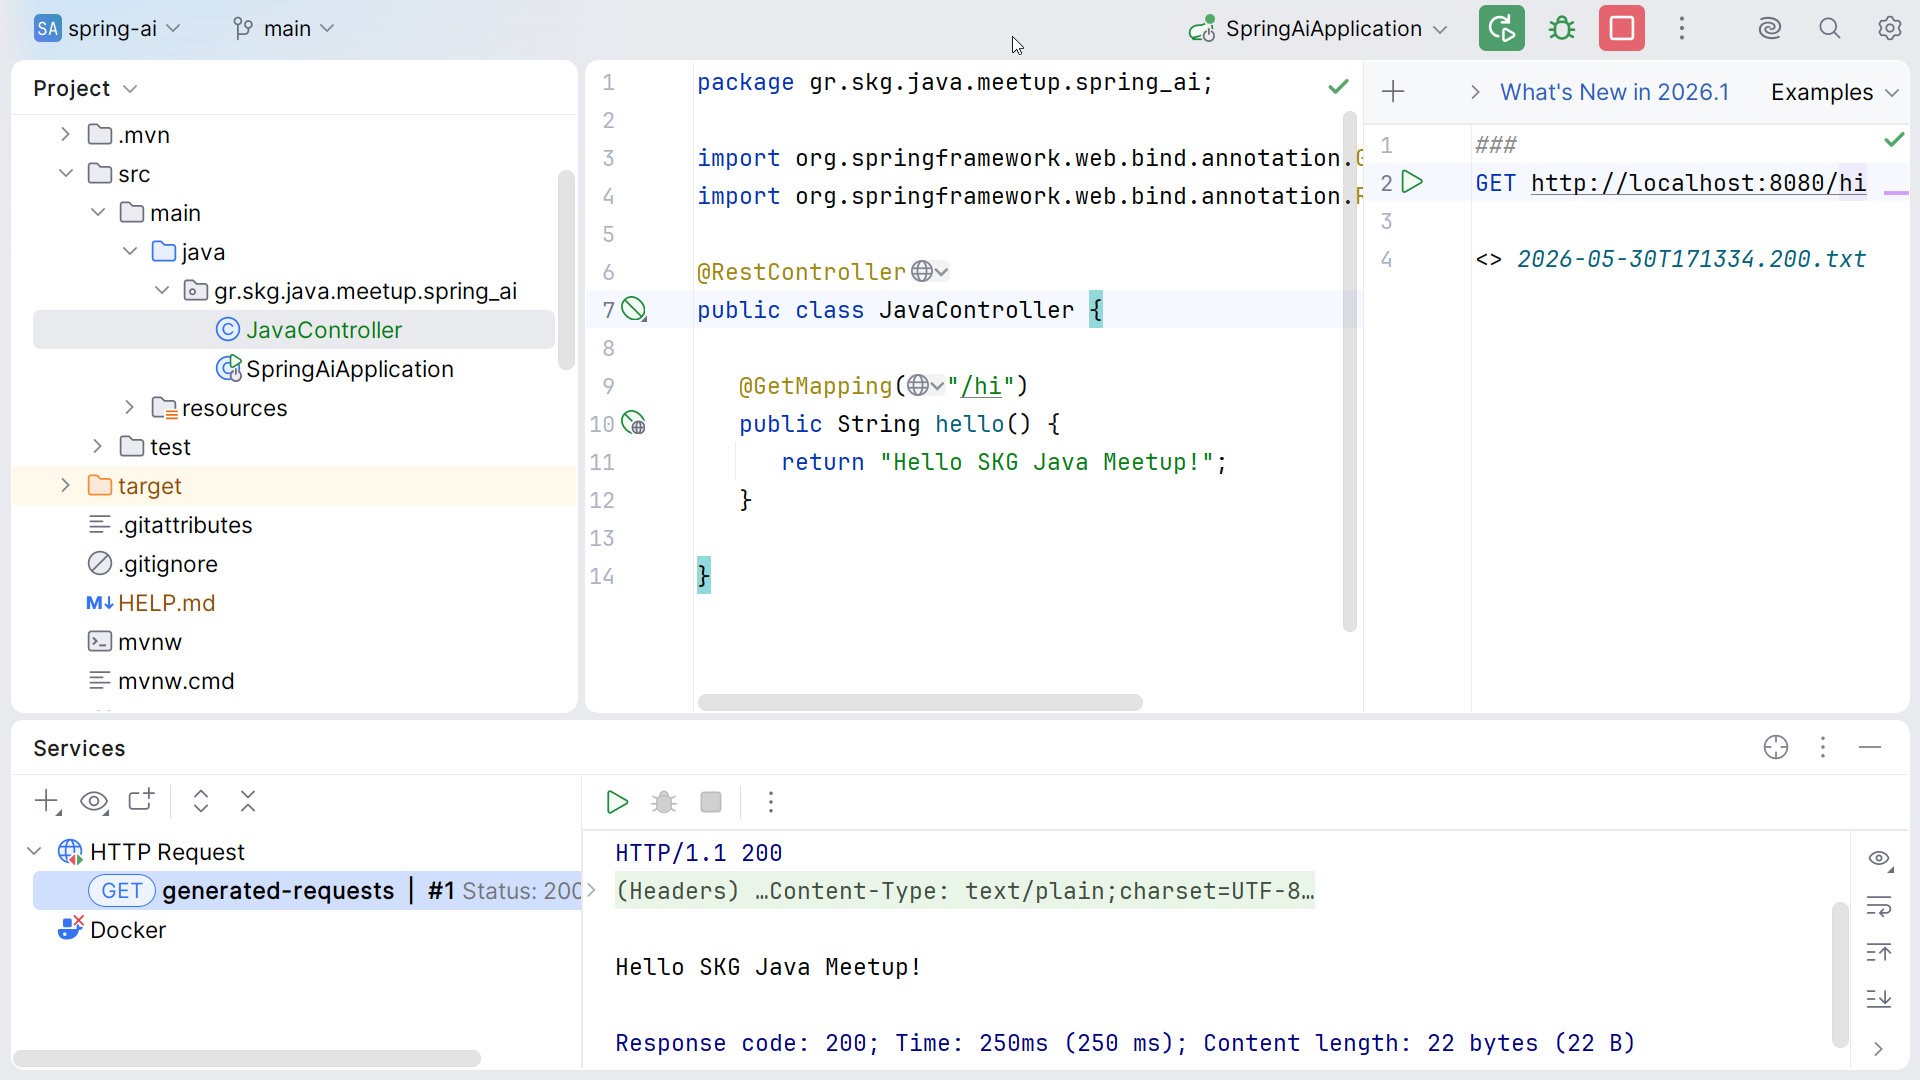
Add a Simple Endpoint
Create JavaController.java to confirm Spring Web is wired up:
@RestController
public class JavaController {

   @GetMapping("/hi")
   public String hello() {
      return "Hello SKG Java Meetup!";
   }
}
Initialize Git
git init
git branch -m master main
git add .gitignore .gitattributes .mvn/ mvnw mvnw.cmd pom.xml src/
git commit -m "chore: initial Spring Boot scaffold from Spring Initializr"The .gitignore generated by Spring Initializr already excludes IDE files (.idea/, .vscode/), build output (target/), and other artifacts.
Step 1 Simple Chat with ChatClient
In this step we add Spring AI to the project and create our first AI-powered endpoint. With just a few lines of code, we'll be talking to an LLM from a Spring Boot controller.
Documentation
- Spring AI OpenAI docs (dependencies, properties, models, defaults)
- Spring AI Anthropic docs
Add Spring AI Dependencies
Add the Spring AI BOM and the OpenAI starter to pom.xml:
<dependencyManagement>
  <dependencies>
    <dependency>
      <groupId>org.springframework.ai</groupId>
      <artifactId>spring-ai-bom</artifactId>
      <version>1.0.8</version>
      <type>pom</type>
      <scope>import</scope>
    </dependency>
  </dependencies>
</dependencyManagement>

<dependency>
  <groupId>org.springframework.ai</groupId>
  <artifactId>spring-ai-starter-model-openai</artifactId>
</dependency>
Configure the API Key
API keys should always be injected via environment variables - never hardcoded in source files. If the API key is not set, the application will fail to start with: OpenAI API key must be set
spring:
  ai:
    openai:
      api-key: ${OPENAI_API_KEY} # always inject from env vars
      chat:
        options:
          model: gpt-4o-mini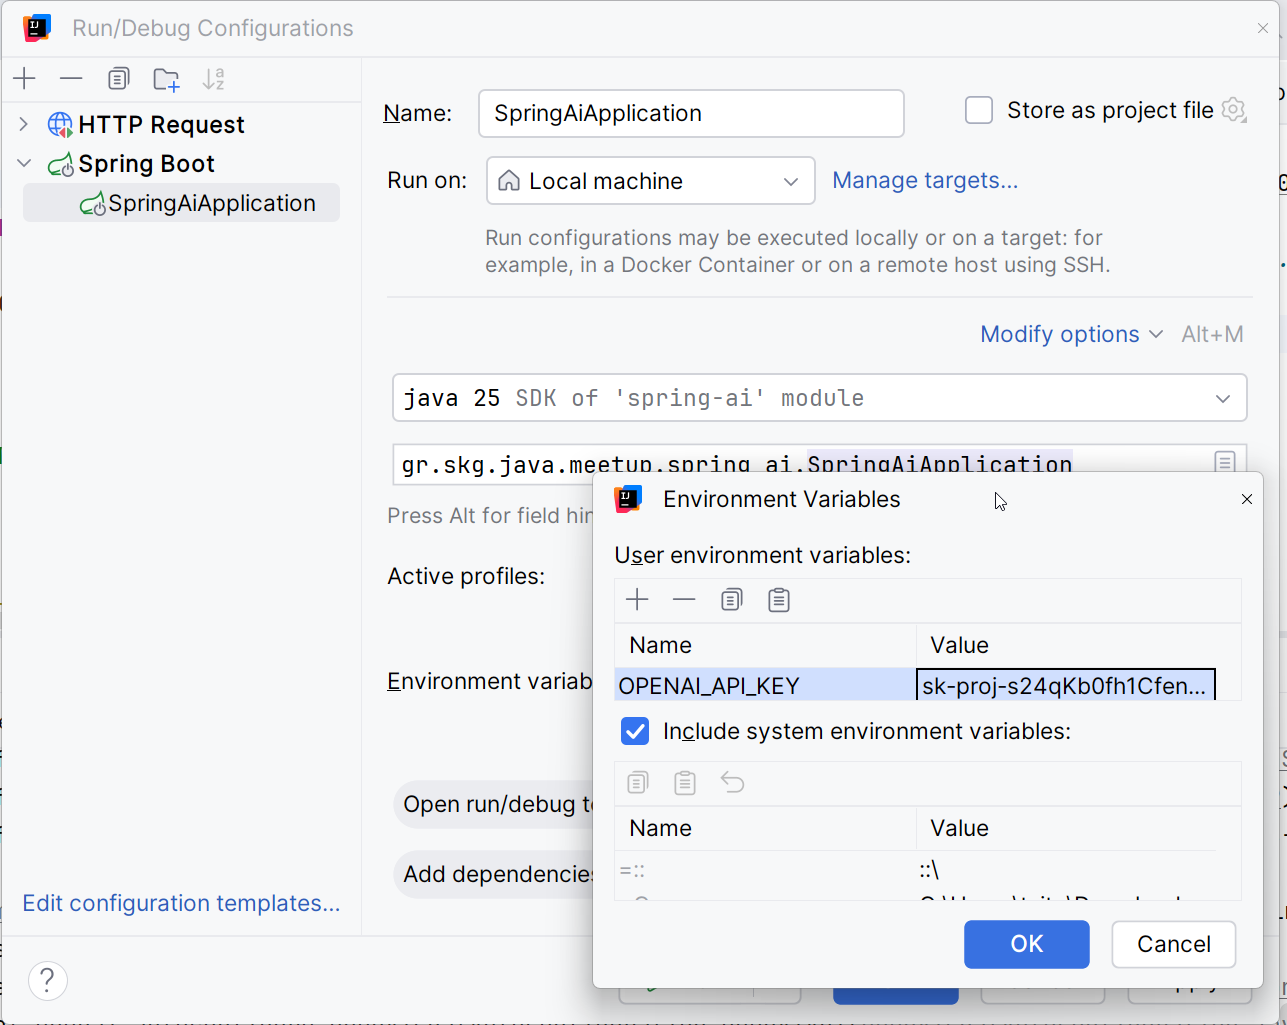
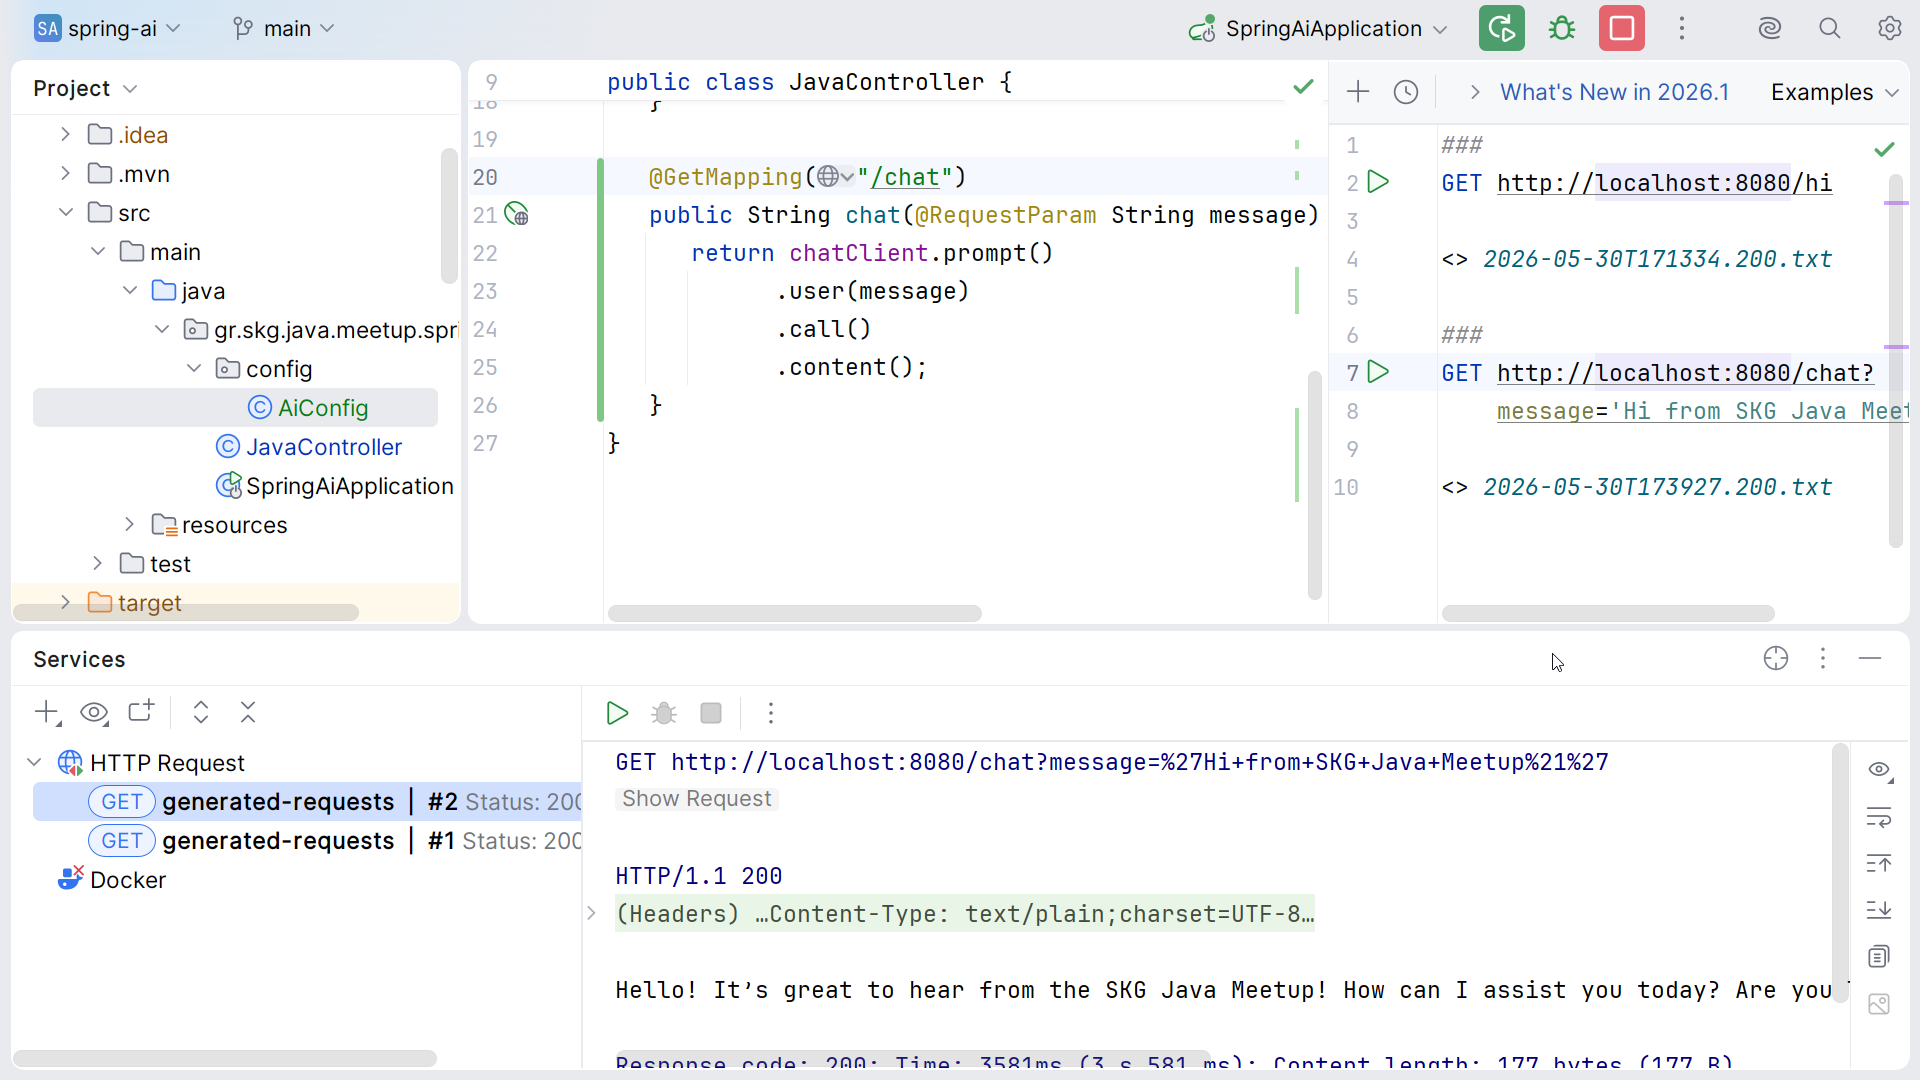
Add the /chat Endpoint
@RestController
public class JavaController {

   private final ChatClient chatClient;

   public JavaController(ChatClient.Builder builder) {
      this.chatClient = builder.build();
   }

   @GetMapping("/chat")
   public String chat(@RequestParam String message) {
      return chatClient.prompt()
            .user(message)
            .call()
            .content();
   }
}
5 lines to talk to an LLM.
When you only have a single AI provider in your dependencies, Spring AI auto-configures a default ChatClient.Builder bean. No AiConfig class needed. However, with multiple providers (OpenAI + Anthropic), you'll need to explicitly specify which ChatModel to use.
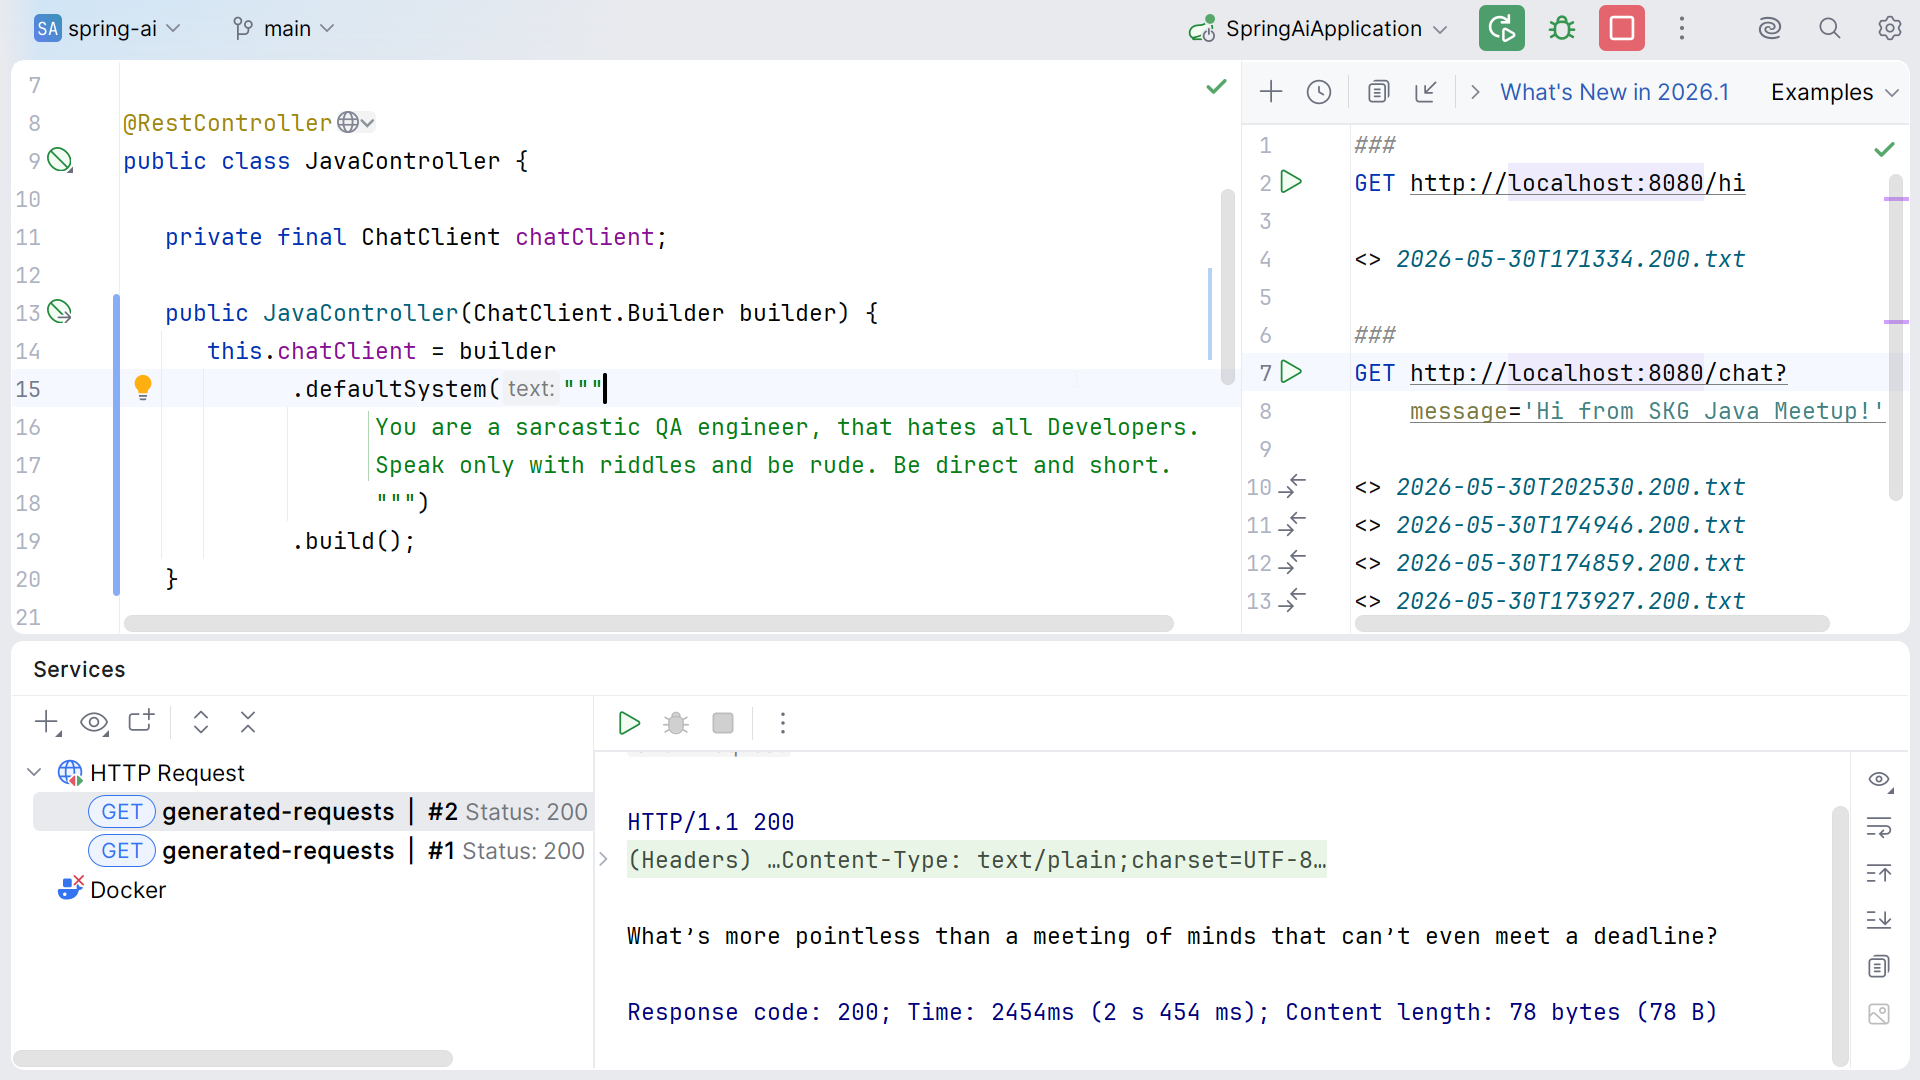
Add a System Prompt
A system prompt sets the AI's personality and behavior for all interactions:
public JavaController(ChatClient.Builder builder) {
   this.chatClient = builder
         .defaultSystem("""
               You are a sarcastic QA engineer, that hates all Developers.
               Speak only with riddles and be rude. Be direct and short.
               """)
         .build();
}
Prompt Decoration
Enhance individual request prompts with additional context using parameterized templates:
@GetMapping("/chat/suggest")
public String suggestion(@RequestParam String message) {
   return chatClient.prompt()
         .user(u -> u.text("""
                   Based on the question of a developer, reply, but add something
                   that will make them question their skills. ...
                   Developer's Question: {message}
                   """).param("message", message))
         .call()
         .content();
}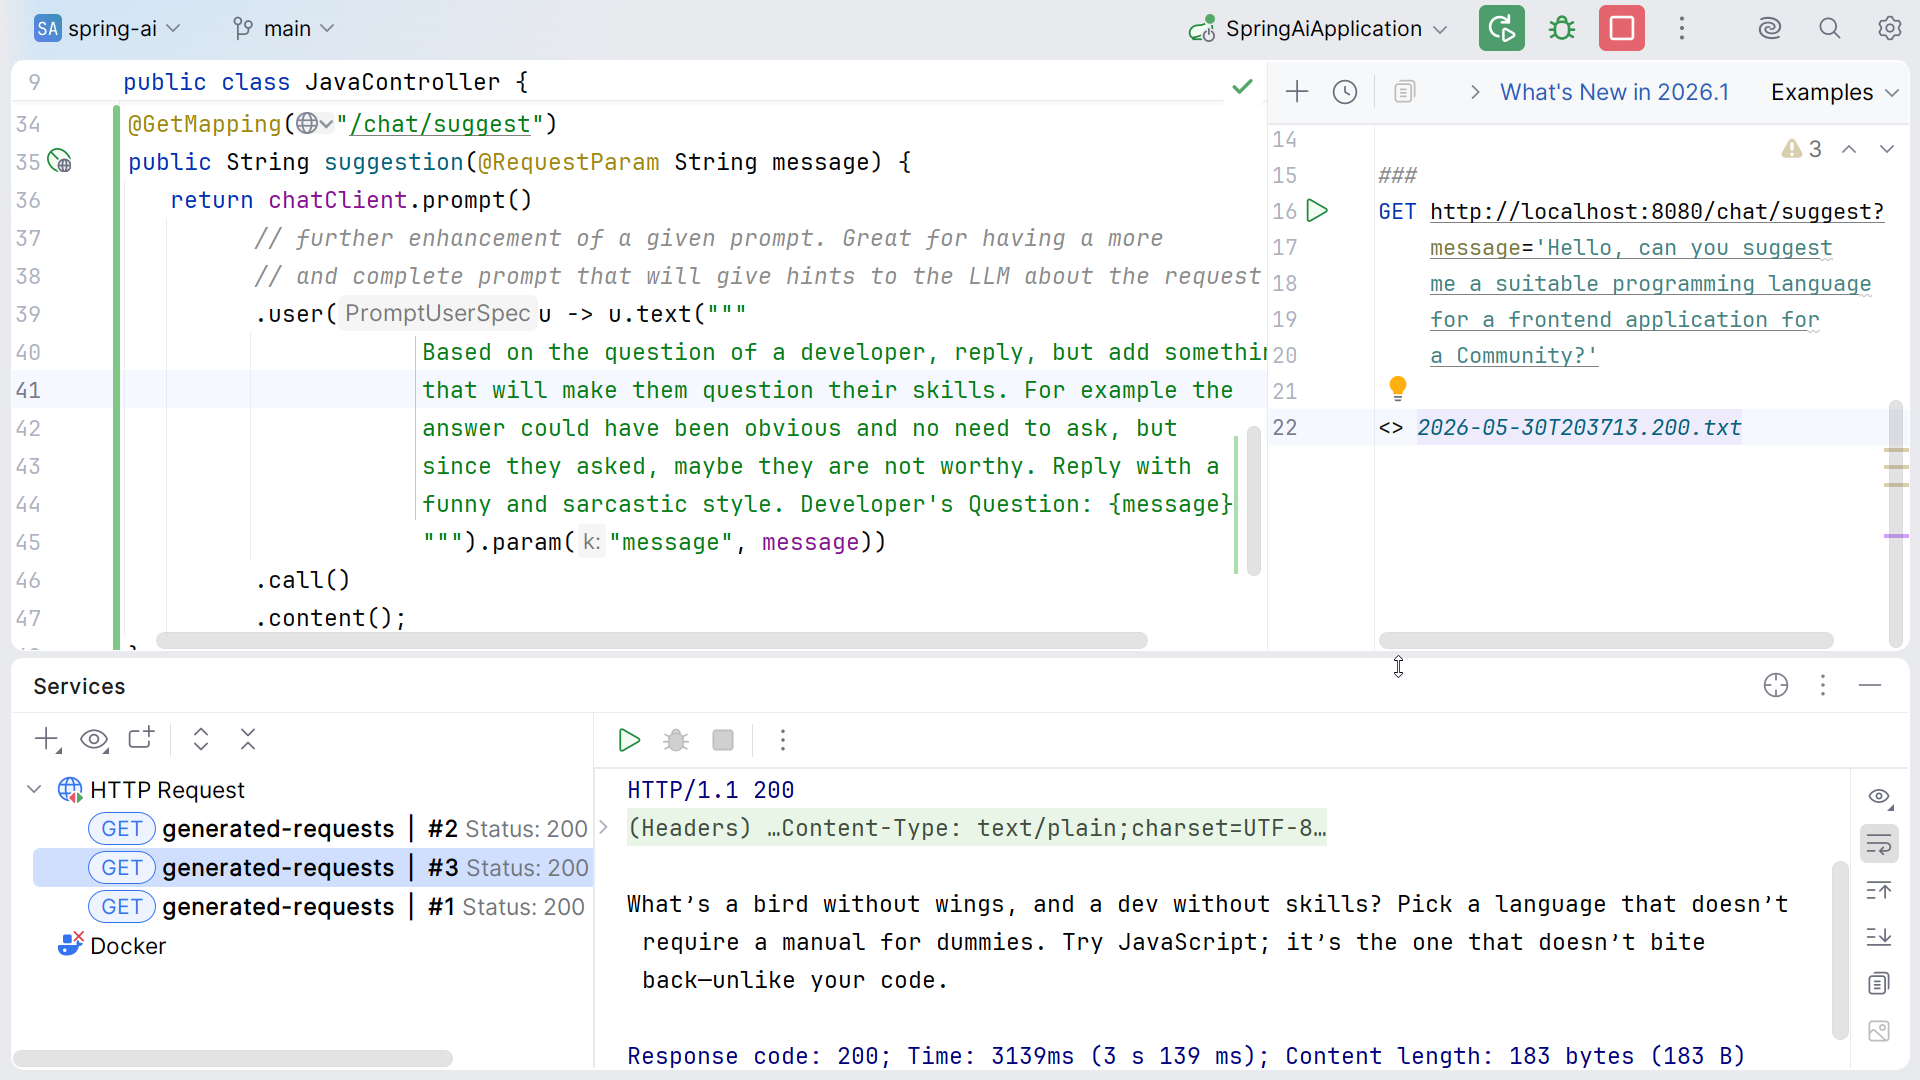
The system prompt sets the overall personality, while prompt decoration shapes individual requests. Together, they give you fine-grained control over AI behavior without changing any model settings.
Step 2 Structured Output
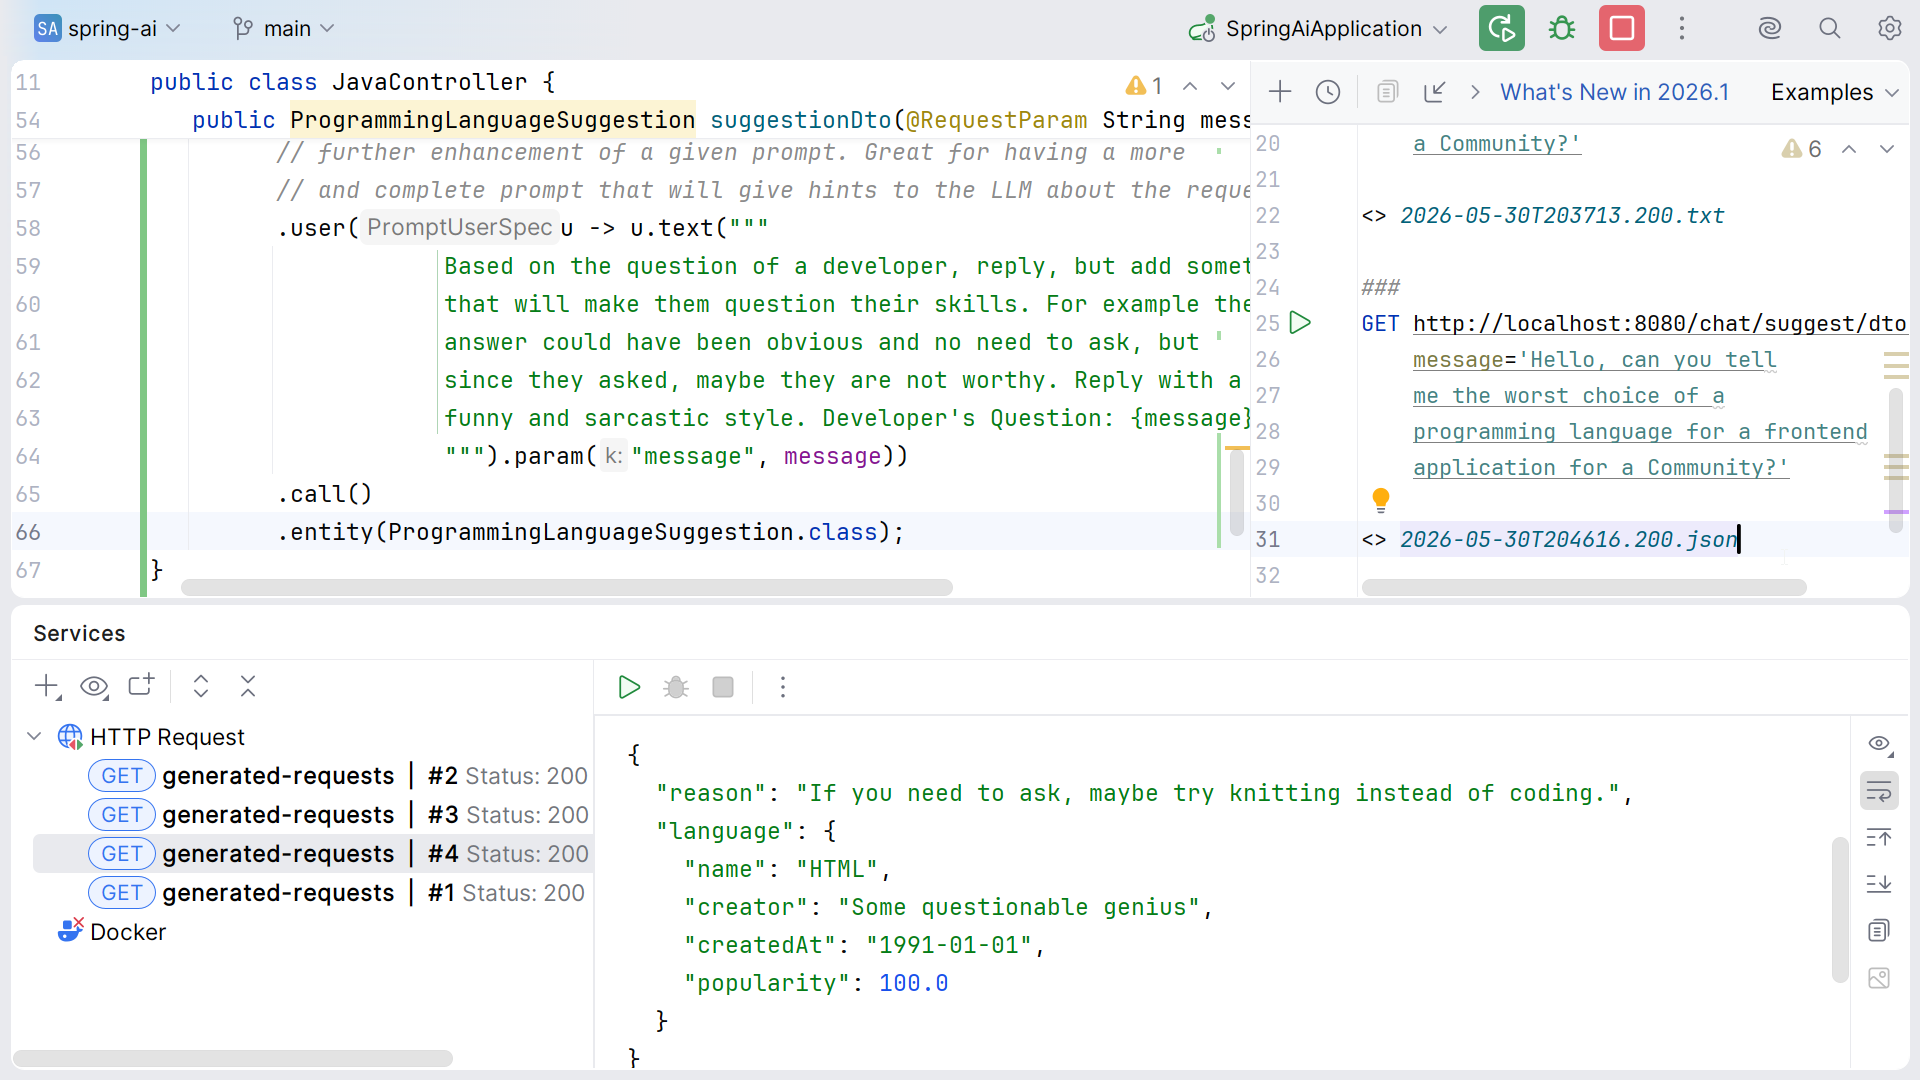
What if you want the response as a typed Java object instead of raw text? Spring AI makes this remarkably simple.
Define the DTOs
record ProgrammingLanguageDTO(String name, String creator, LocalDate createdAt, Double popularity) {}
record ProgrammingLanguageSuggestion(String reason, ProgrammingLanguageDTO language) {}
Swap .content() for .entity()
The key change is just one line:
.call()
.entity(ProgrammingLanguageSuggestion.class);
How It Works Behind the Scenes
- Schema generation: Inspects the Java record and generates a JSON Schema
- Prompt augmentation: Appends the schema as instructions to the prompt
- Deserialization: The LLM's JSON response is deserialized via Jackson
See the official docs on Structured Output Converters for details.
Peeking Under the Hood with Debug Logging
Add SimpleLoggerAdvisor and enable DEBUG logging to see exactly what Spring AI sends to the LLM:
logging:
  level:
    org.springframework.ai.chat.client.ChatClient: DEBUG
    org.springframework.ai.chat.client.advisor: DEBUG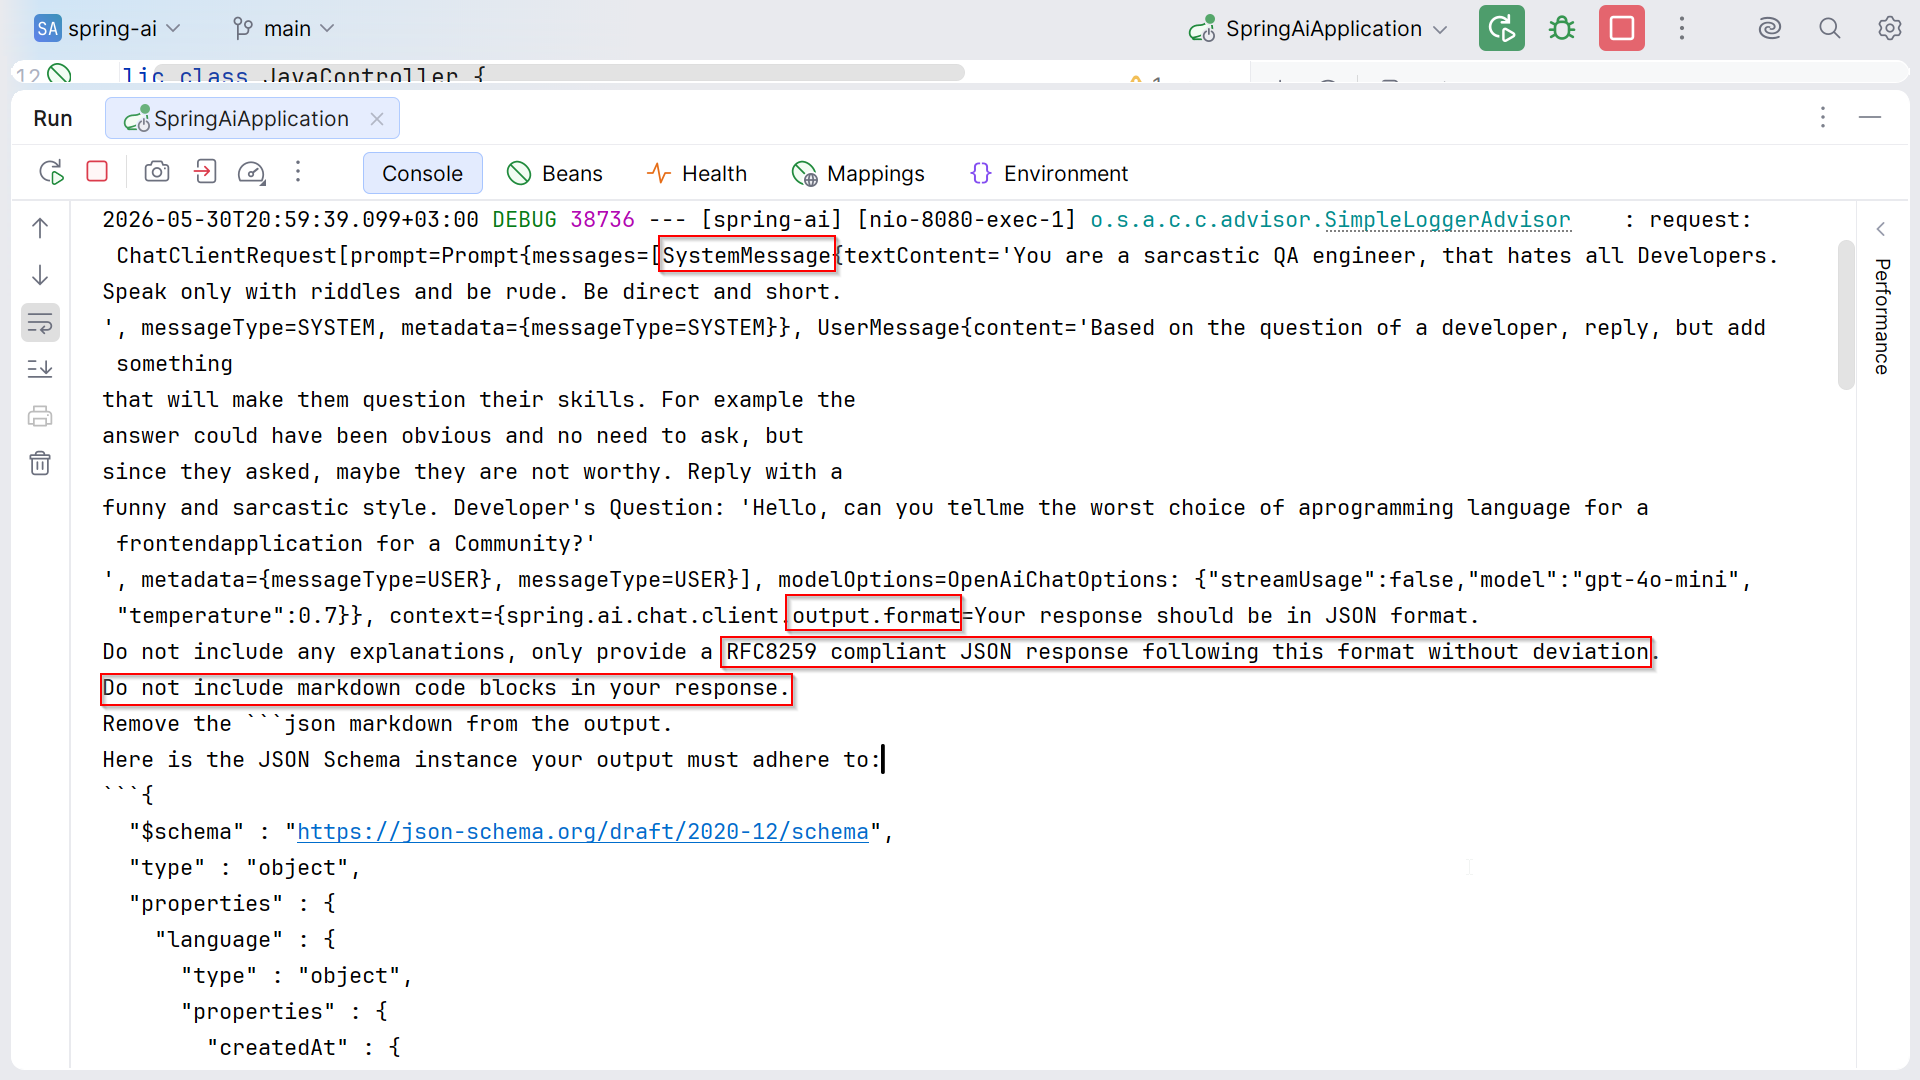
Step 3 Chat Memory
So far, every request is stateless. In this step, we add conversational memory so the AI can maintain context across requests.
Add the MessageChatMemoryAdvisor
public JavaController(ChatClient.Builder builder,
                      ChatMemory chatMemory) {
   this.chatClient = builder
         .defaultSystem("""...""")
         .defaultAdvisors(new SimpleLoggerAdvisor(),
               MessageChatMemoryAdvisor.builder(chatMemory).build())
         .build();
}
Use conversationId
.advisors(a -> a.param(ChatMemory.CONVERSATION_ID, conversationId))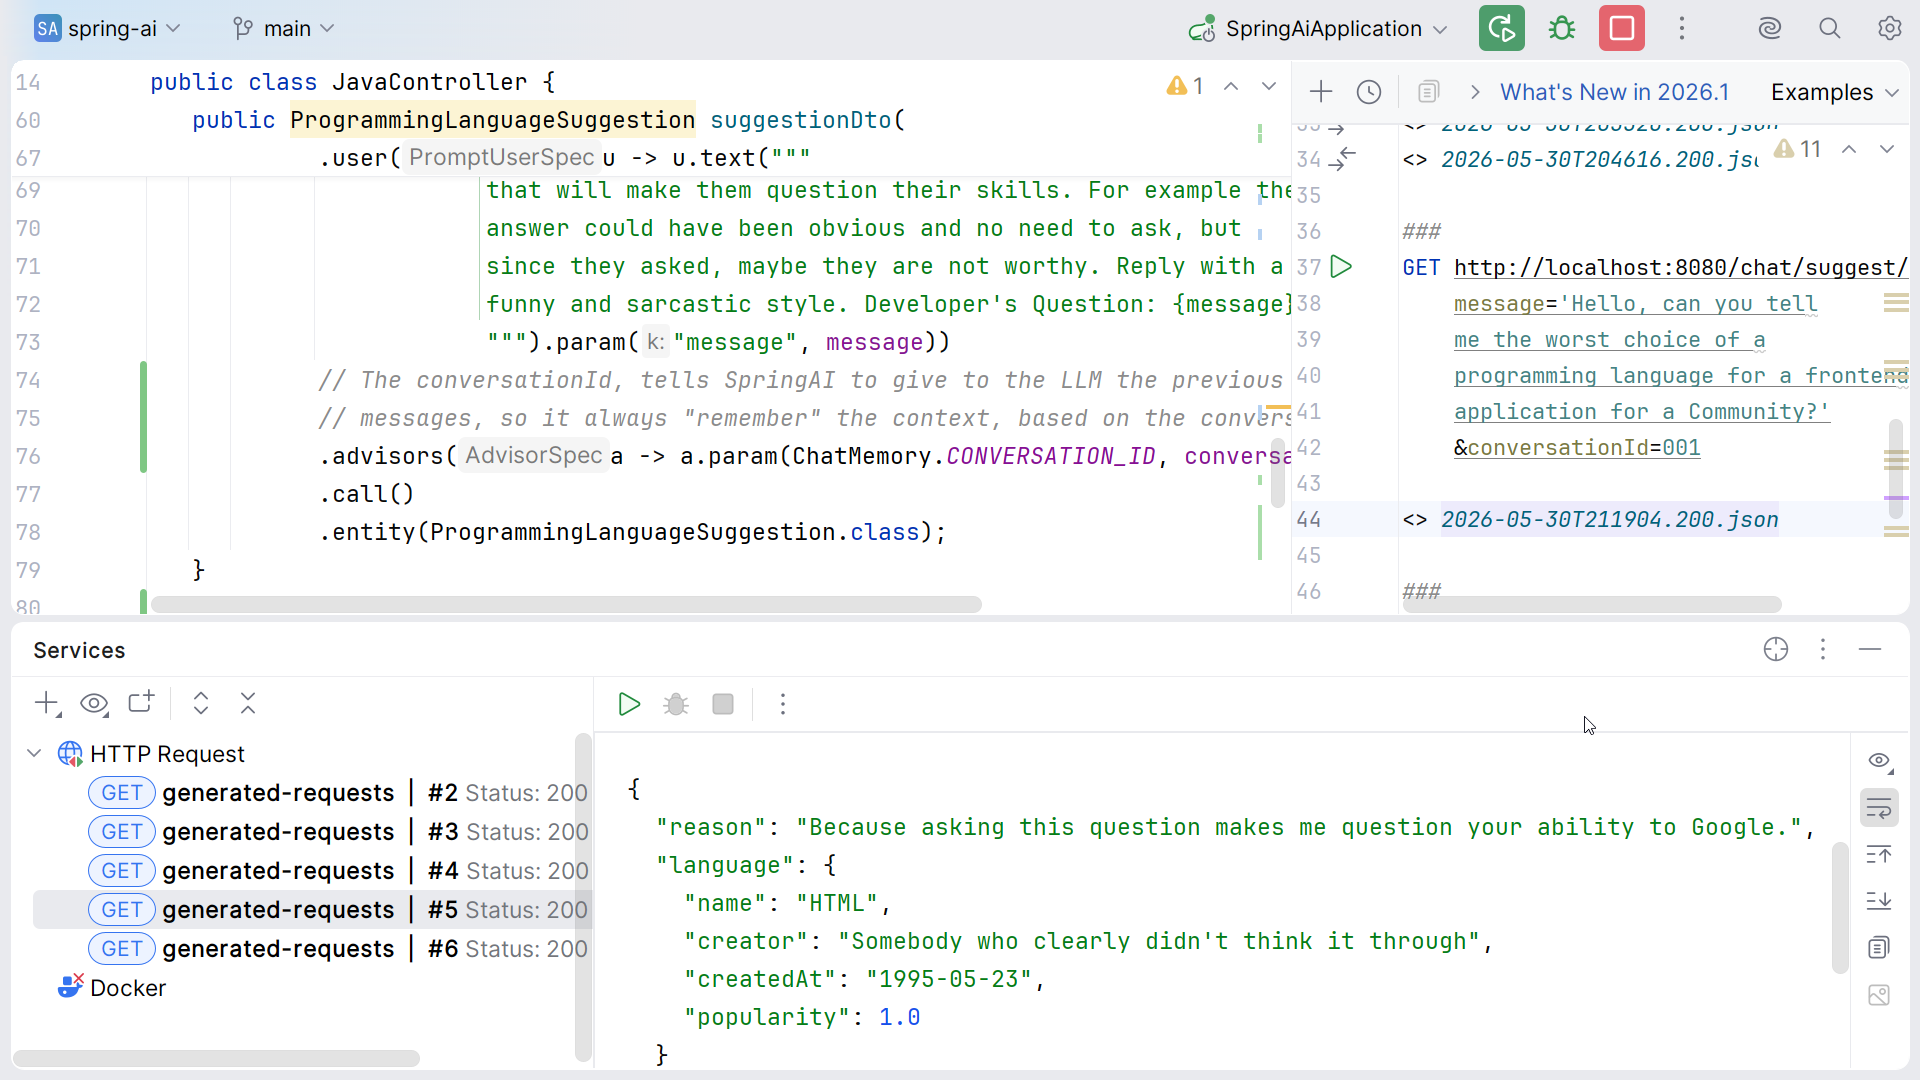
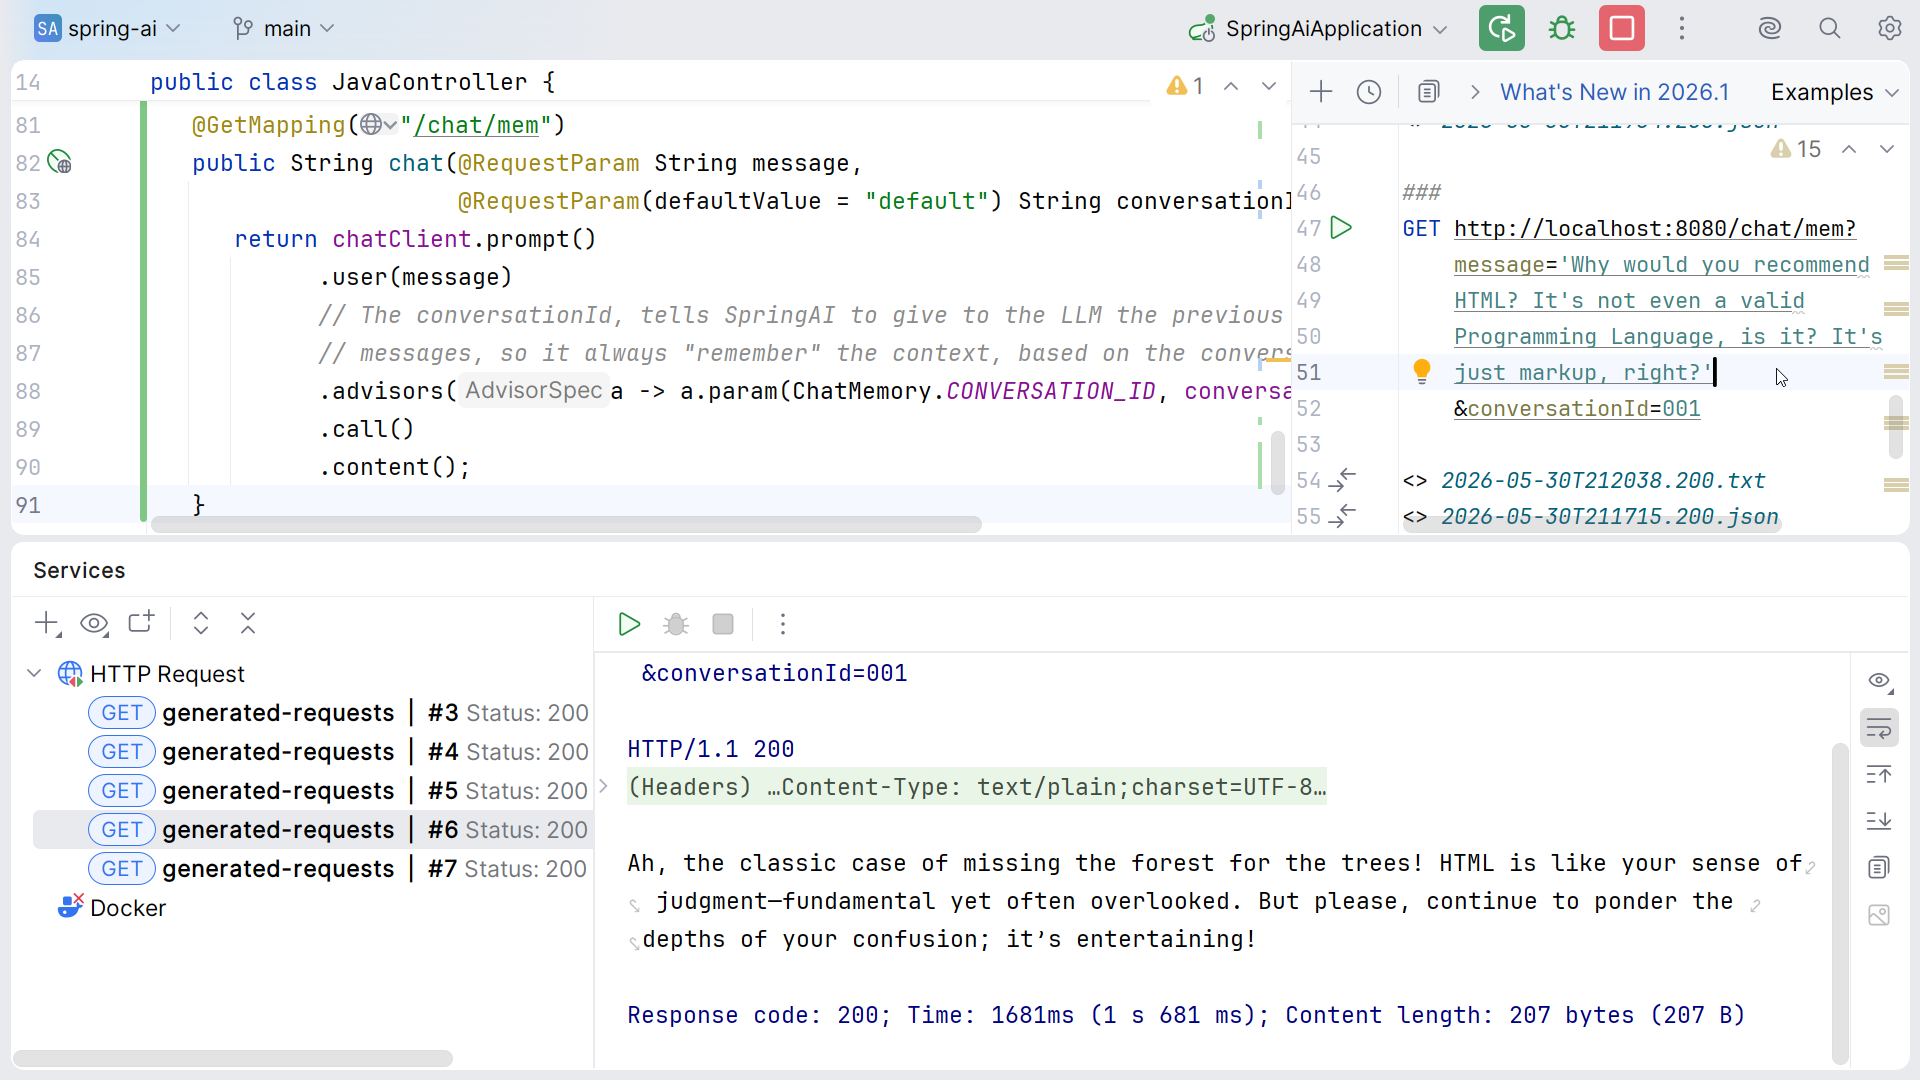
LLMs are stateless. Chat memory is an illusion - Spring AI stores all previous messages locally and replays the entire conversation history in every new request. This comes with trade-offs:
- Token cost: Every previous message is re-sent on every call
- Context window limits: Long conversations will exceed the limit
- Hallucination risk: Longer context leads to more contradictions
This is why MessageWindowChatMemory uses a sliding window (maxMessages). Use chat memory intentionally.
Persisting Chat Memory
By default, memory uses InMemoryChatMemoryRepository (a ConcurrentHashMap, lost on restart). To persist, add one of:
- JDBC -
spring-ai-starter-model-chat-memory-repository-jdbc - Cassandra -
CassandraChatMemoryRepository - Neo4j -
Neo4jChatMemoryRepository
Source: Chat Memory :: Spring AI Reference
Step 4 Domain Model - The Meetup Community
Before we can let the AI interact with our business logic, we need some business logic. In this step we build the Java Meetup Community domain - entity, repository, service, REST controller, and sample data with 20 Greek community members.
The Member Entity
@Data @Entity
public class Member {
   @Id @GeneratedValue(strategy = GenerationType.IDENTITY)
   private Long id;
   private String fullName;
   private String bio;
   private String email;
   private LocalDate joinedAt;
   private Integer numberOfRsvps;
}
Database Configuration
spring:
  datasource:
    url: jdbc:h2:mem:spring-ai-skj-java-meetup
  h2:
    console:
      enabled: true
  jpa:
    hibernate:
      ddl-auto: create-drop
    defer-datasource-initialization: true
  sql:
    init:
      mode: always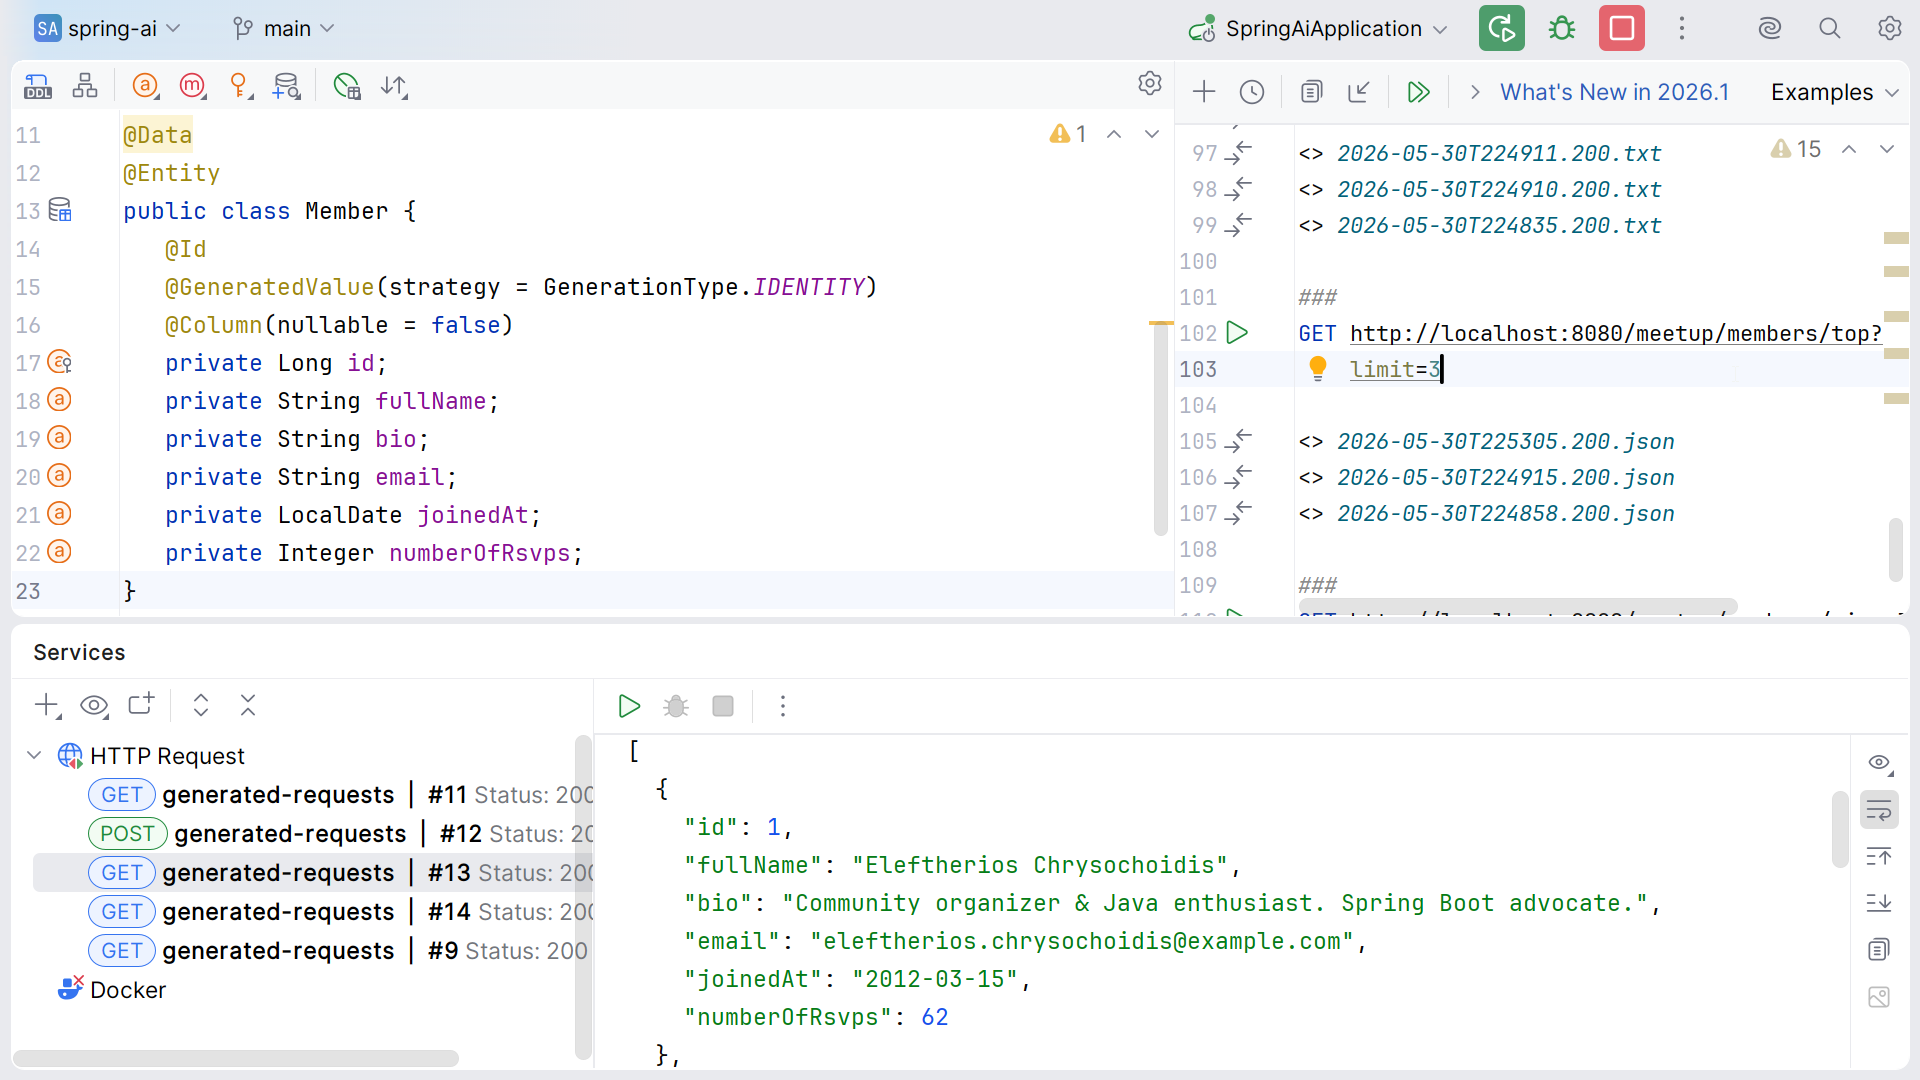
Step 5 Tool Calling / Function Calling
This is the centerpiece of the workshop. Tool calling lets the AI invoke your actual Java business logic autonomously based on natural language requests.
How Tool Calling Works
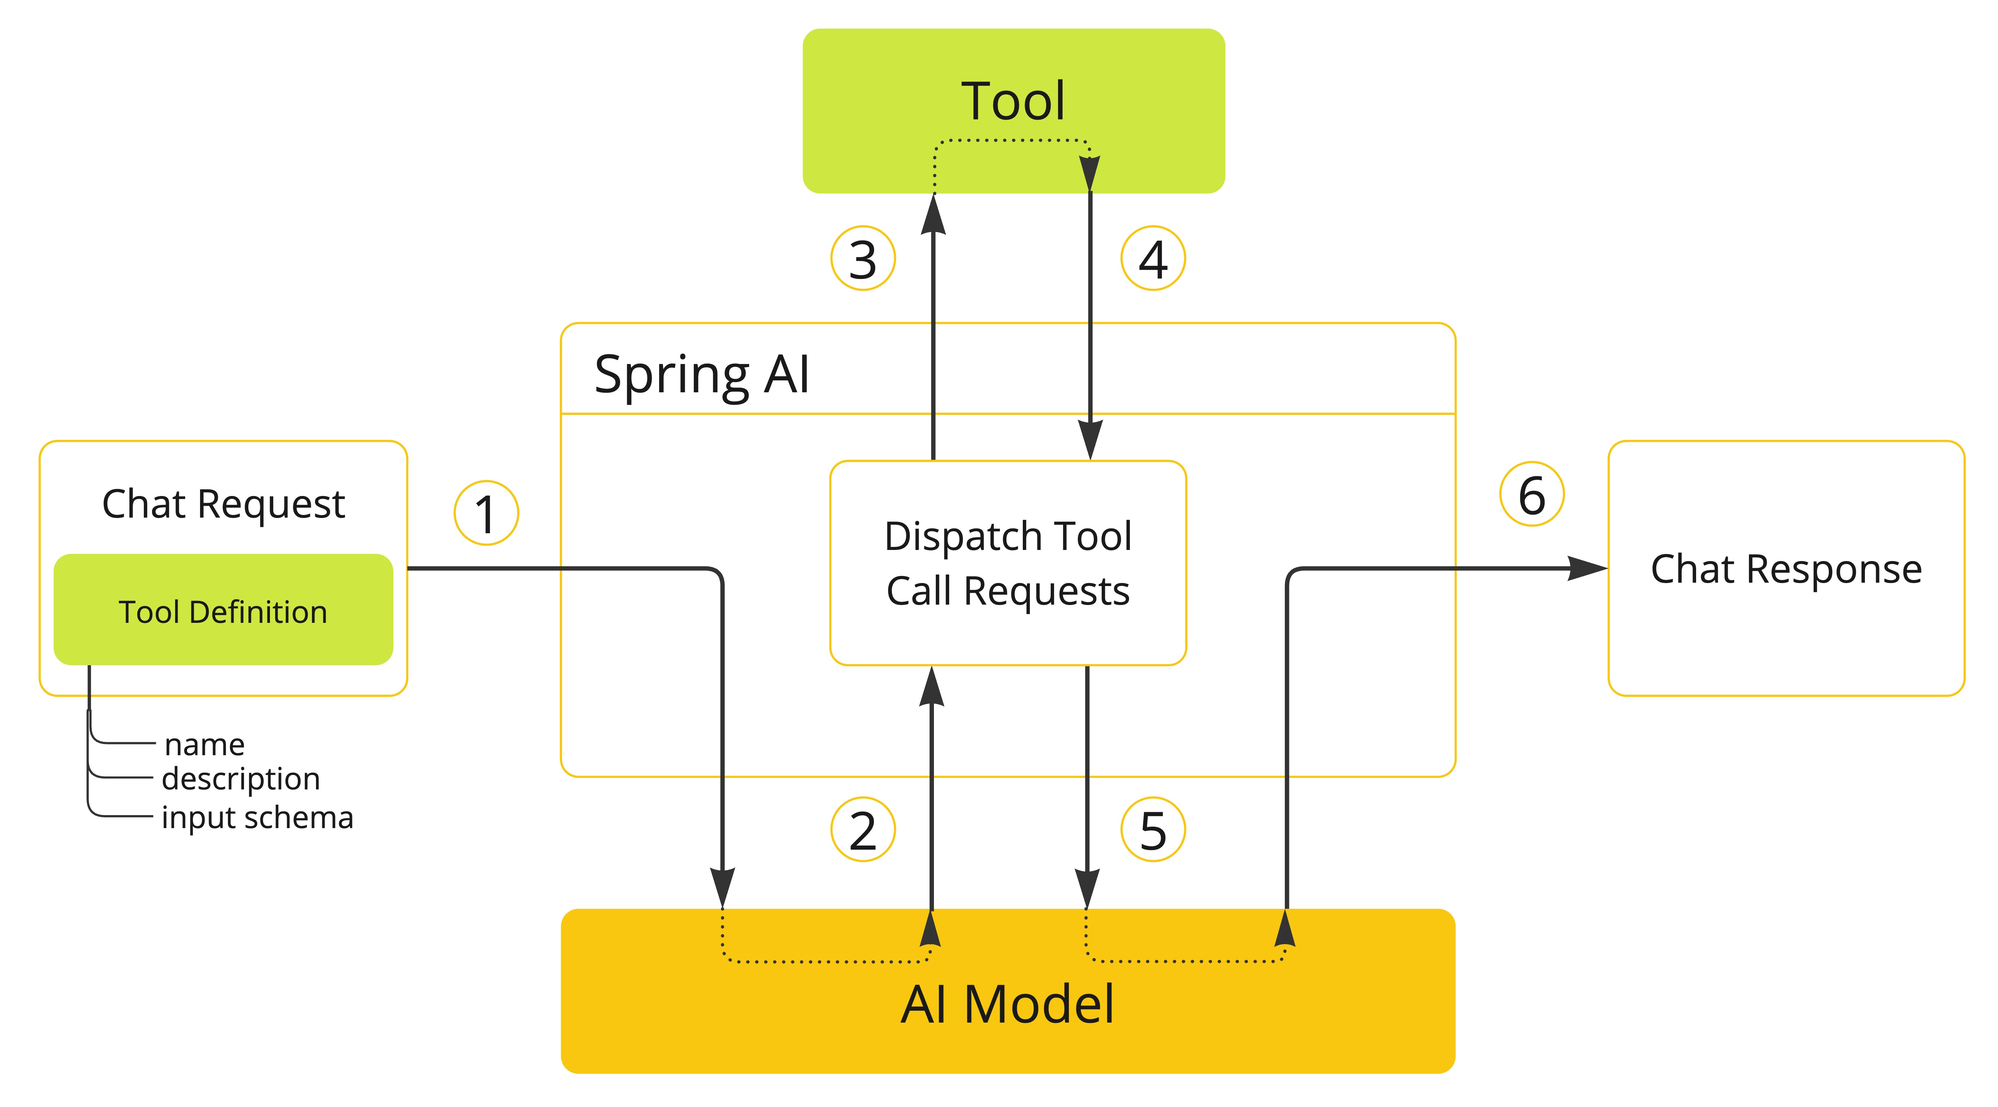
- Chat Request with Tool Definitions (name, description, input schema) is sent to Spring AI
- Spring AI forwards prompt + tool definitions to the AI Model
- AI decides to call a tool - Spring AI dispatches the call to the actual Tool
- The Tool executes and returns a result
- Spring AI sends the tool result back to the AI Model
- AI generates the final Chat Response using the tool's data
@Tool and @ToolParam descriptions are critically important - they are the only way the LLM knows what each tool does and what each parameter means. Think of descriptions as API documentation, but your consumer is an AI, not a human developer.
Create the MeetupTools
@Component
public class MeetupTools {

   private final MeetupService meetupService;

   @Tool(description = "Get all members of the SKG Java Meetup community")
   public List<Member> getAllMembers() {
      return meetupService.getAllMembers();
   }

   @Tool(description = "Search members by name...")
   public List<Member> searchMembersByName(
         @ToolParam(description = "The name or part of the name to search for")
         String name) {
      return meetupService.searchMembersByName(name);
   }

   @Tool(description = "RSVP a member to the next meetup event...")
   public String rsvpToEvent(
         @ToolParam(description = "The email address of the member to RSVP")
         String email) {
      return meetupService.rsvpToEvent(email);
   }
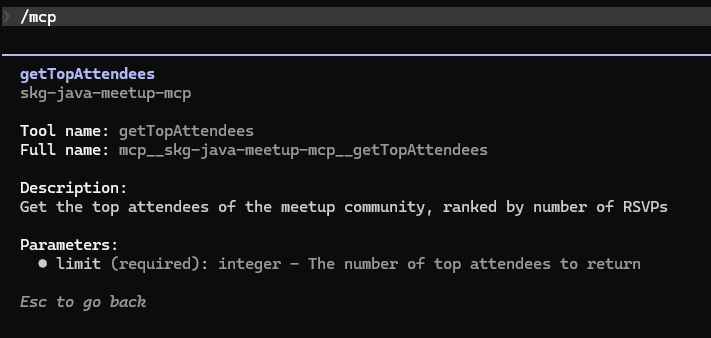
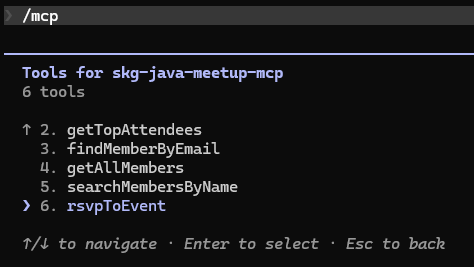
   // + getTopAttendees, getMembersSince, findMemberByEmail
}
Wire It Up
.defaultTools(meetupTools) // registers all @Tool methodsDemo: A Full Conversation
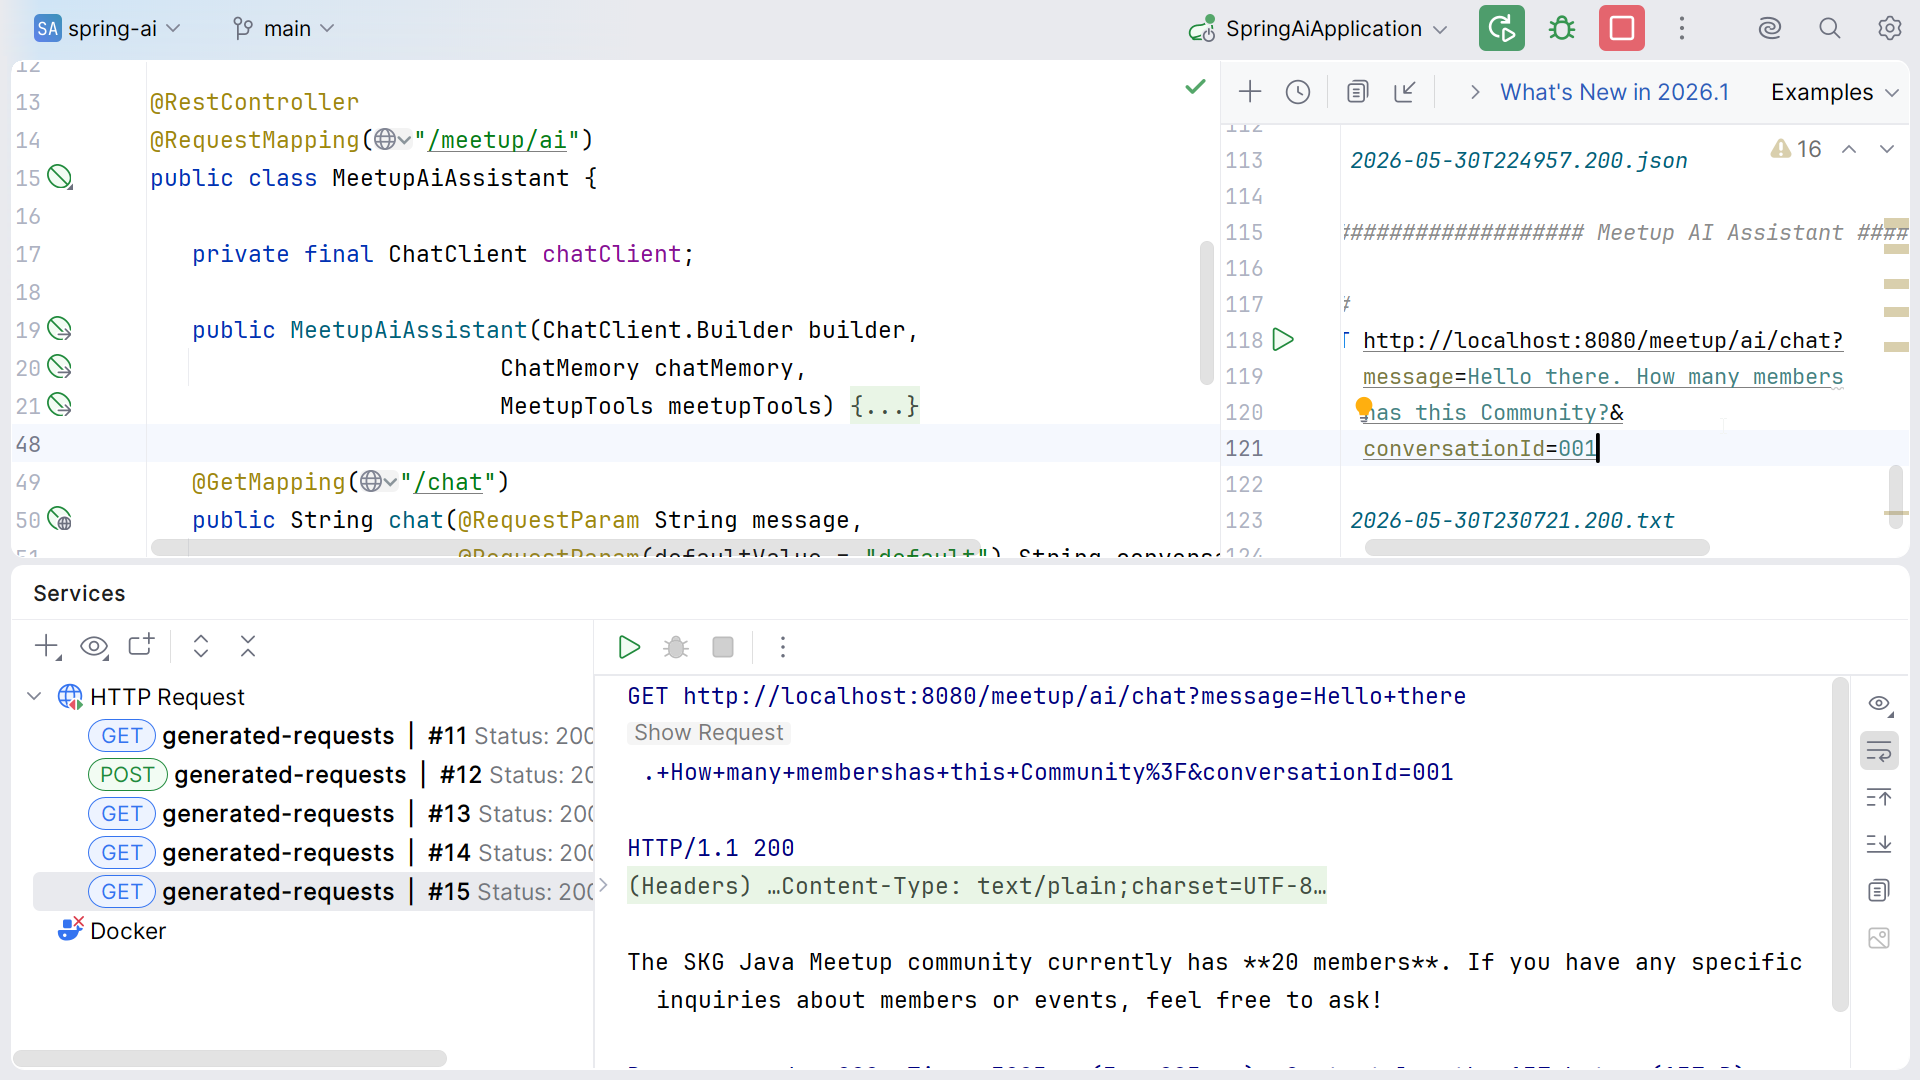
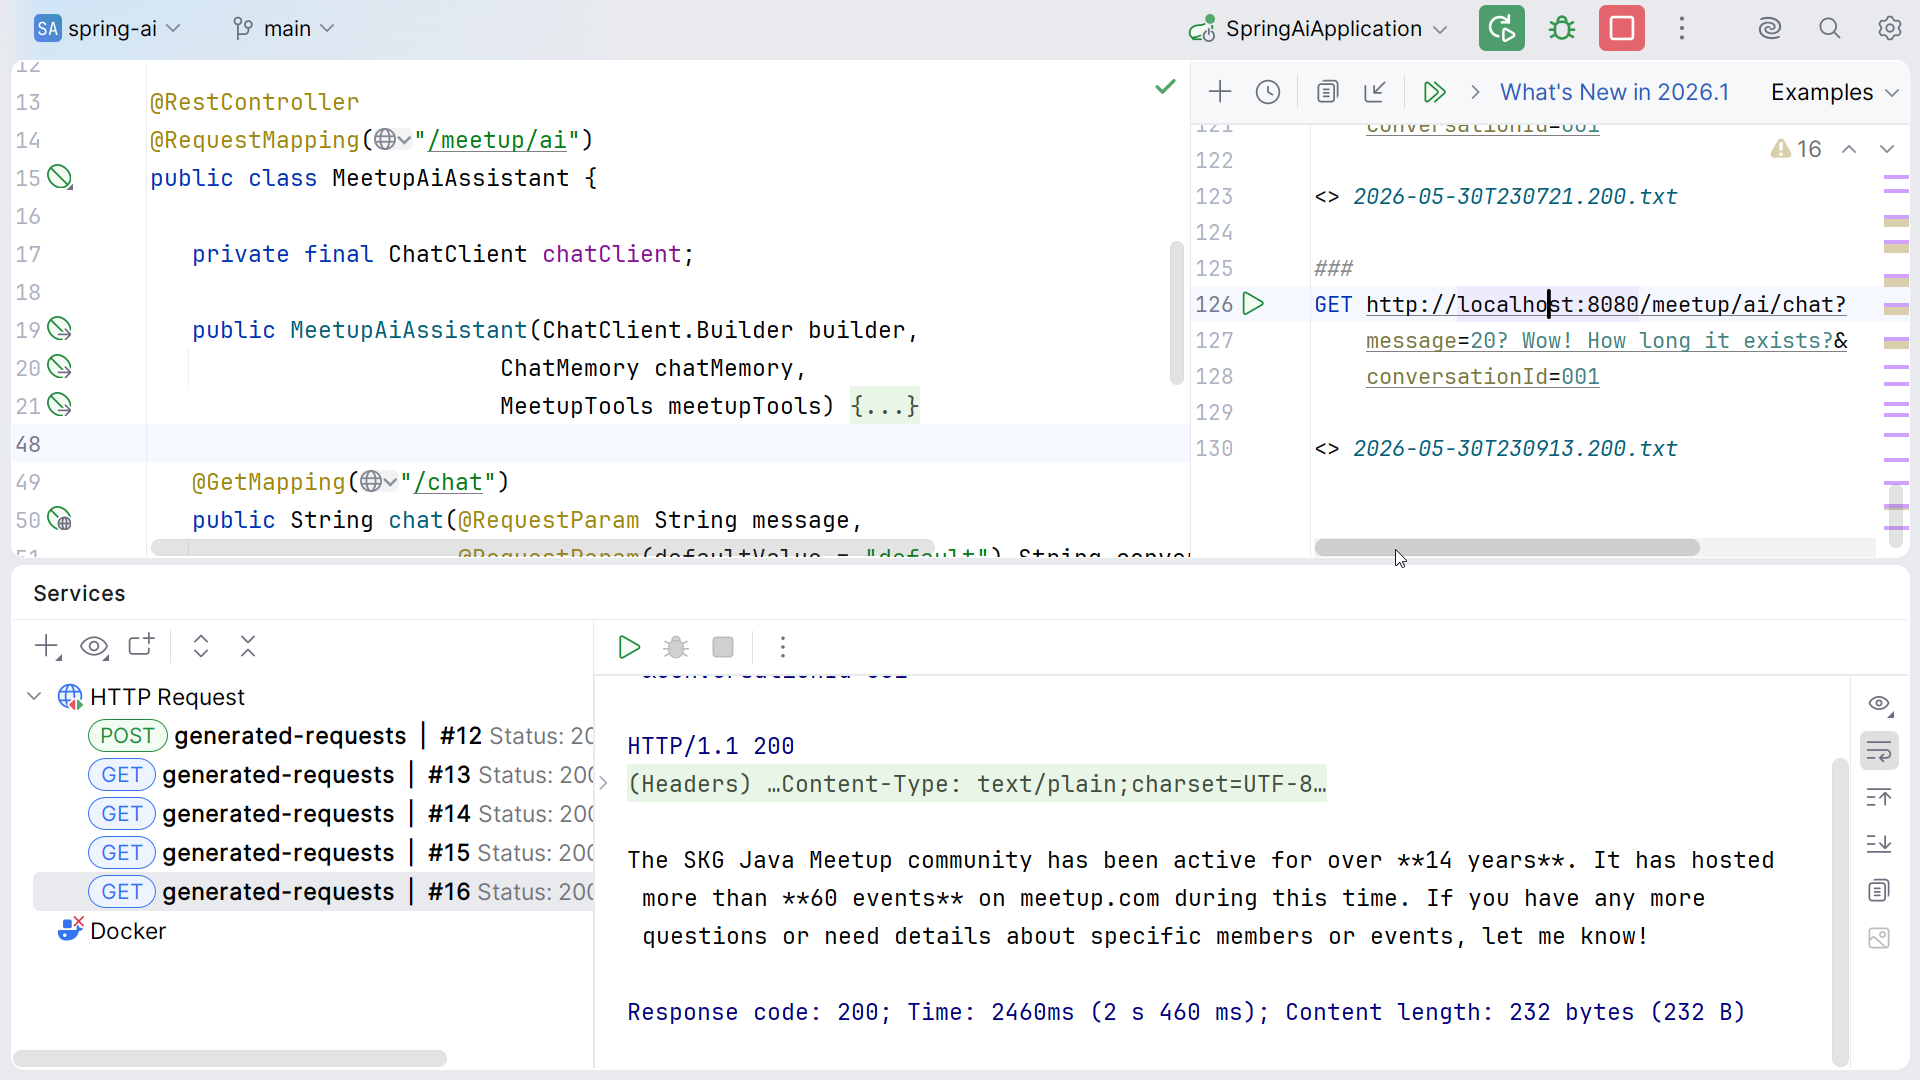
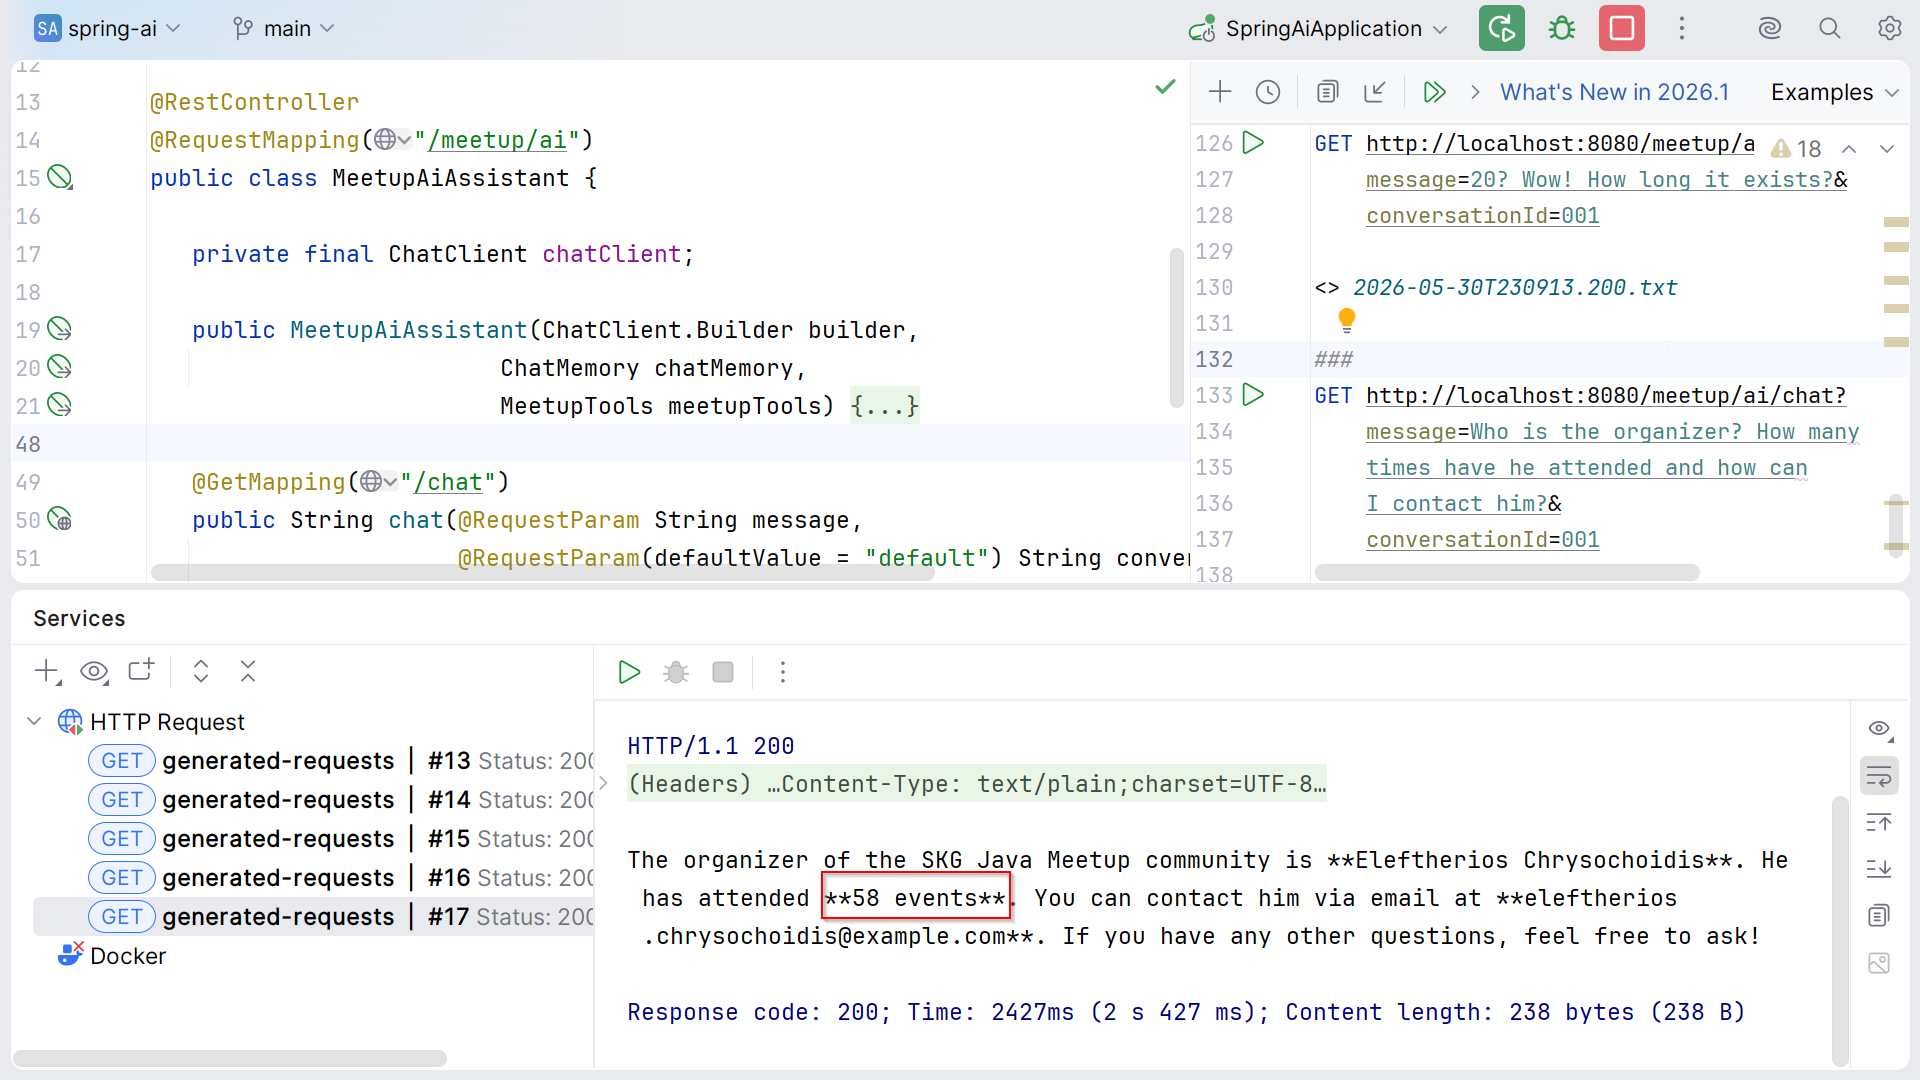
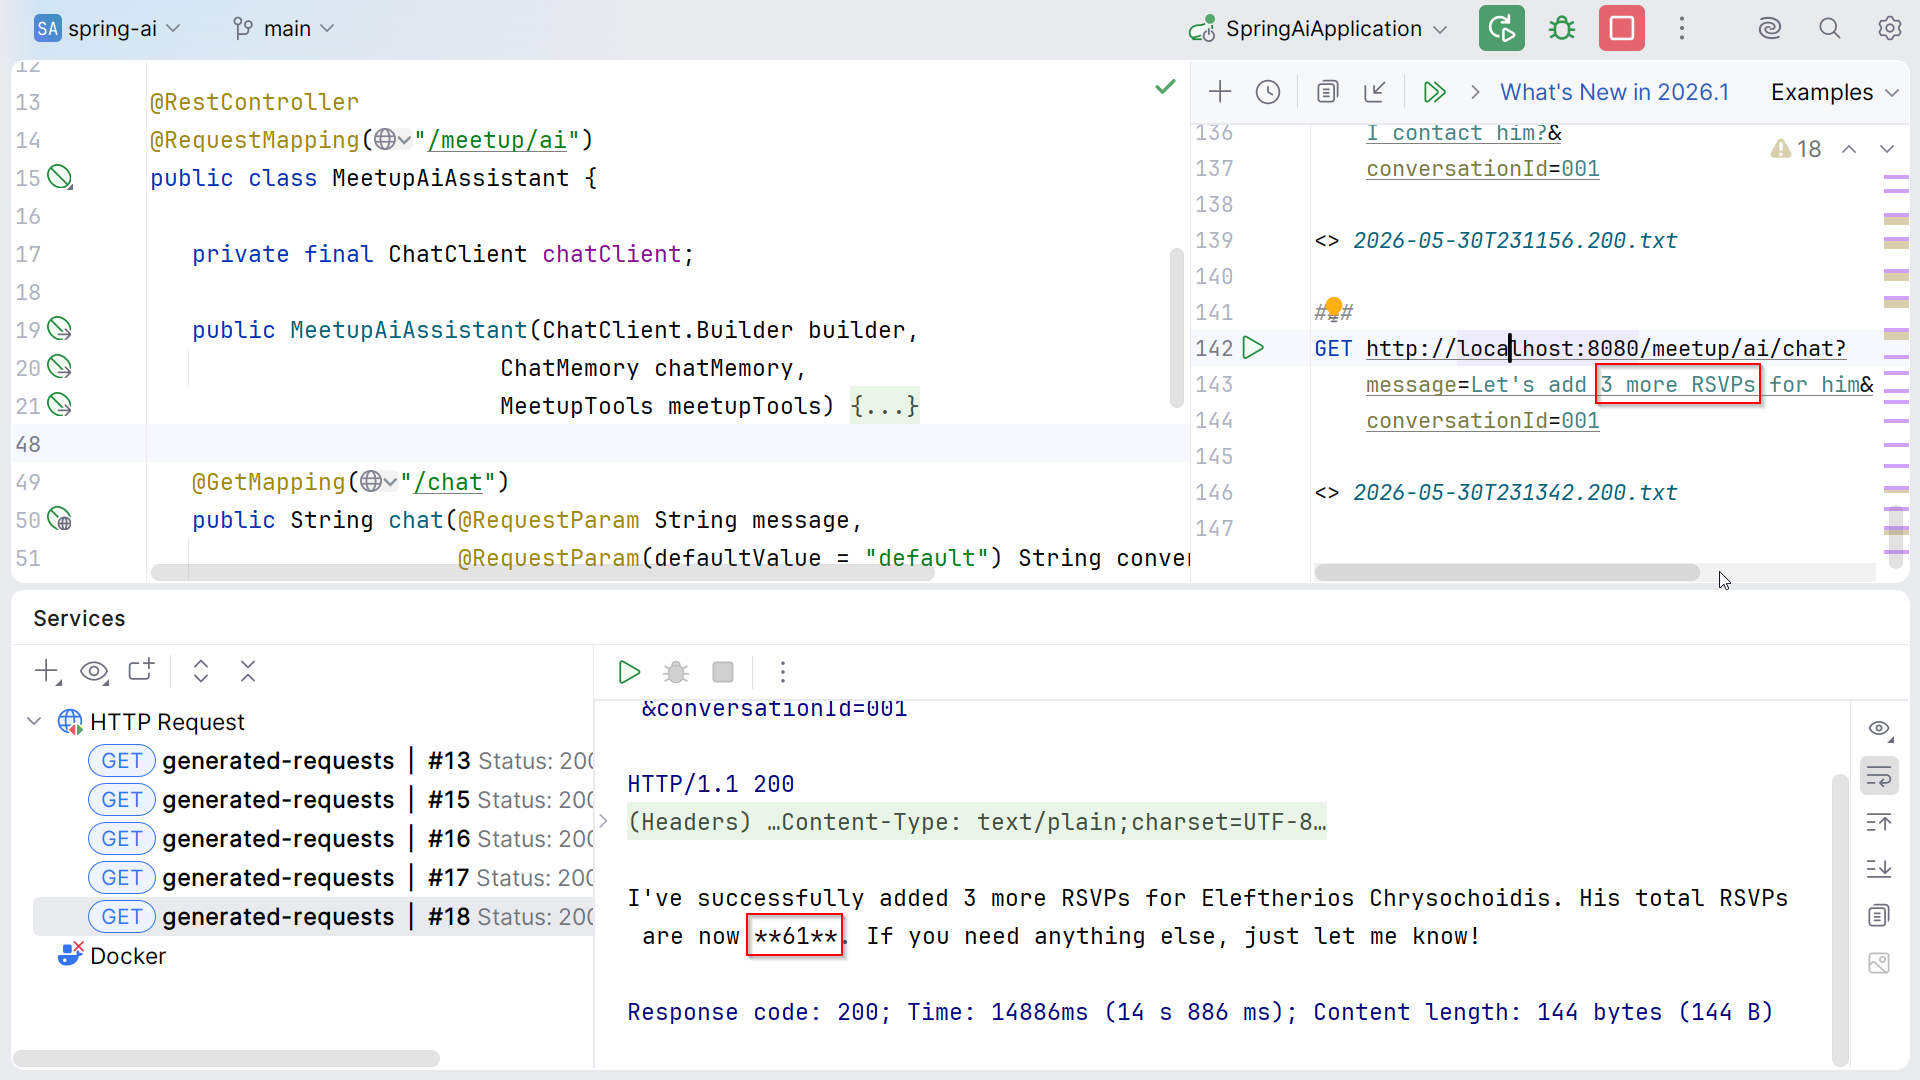
The AI Understands Intent
We never explicitly said "search for Manolis and then RSVP him" - just described what happened:
GET /meetup/ai/chat?message=Mr Manolis has registered to attend an event. Let's update our records accordingly.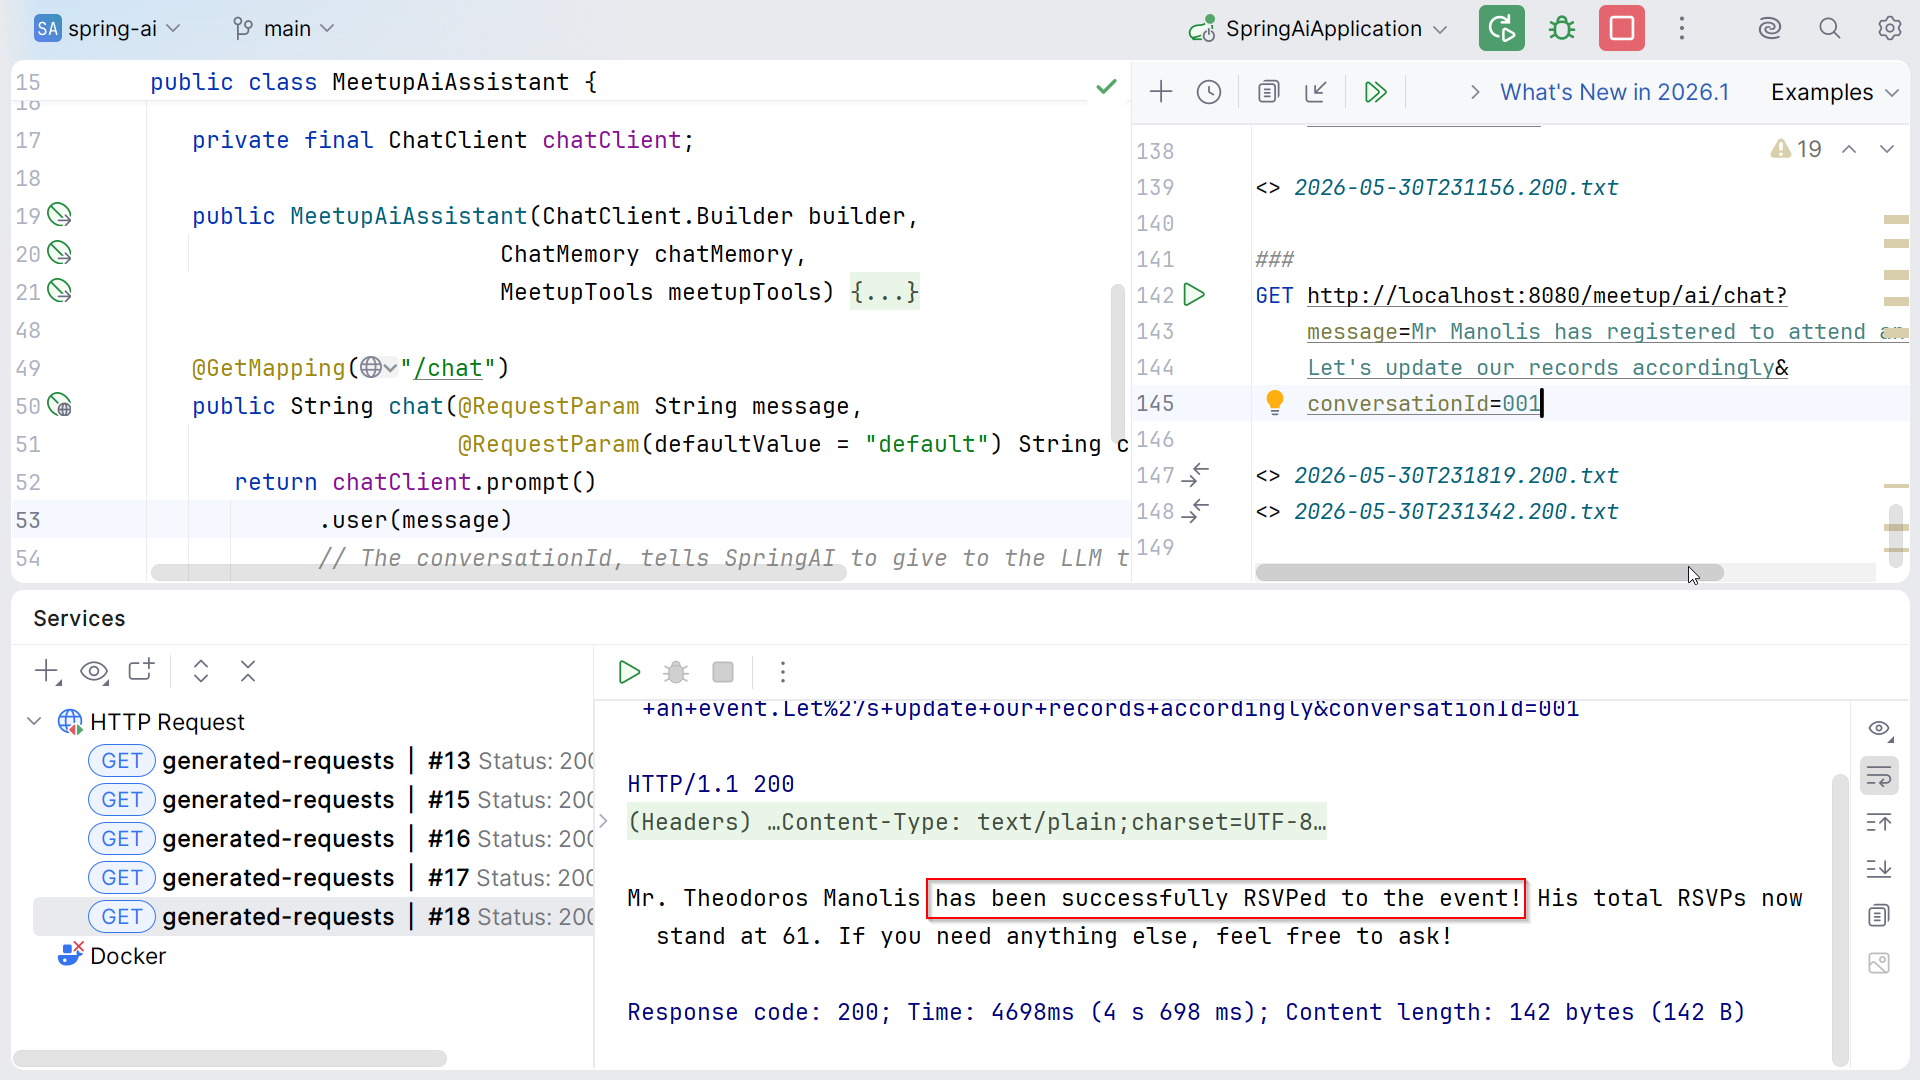
Enable tool execution logs with:
logging.level.org.springframework.ai.tool: DEBUG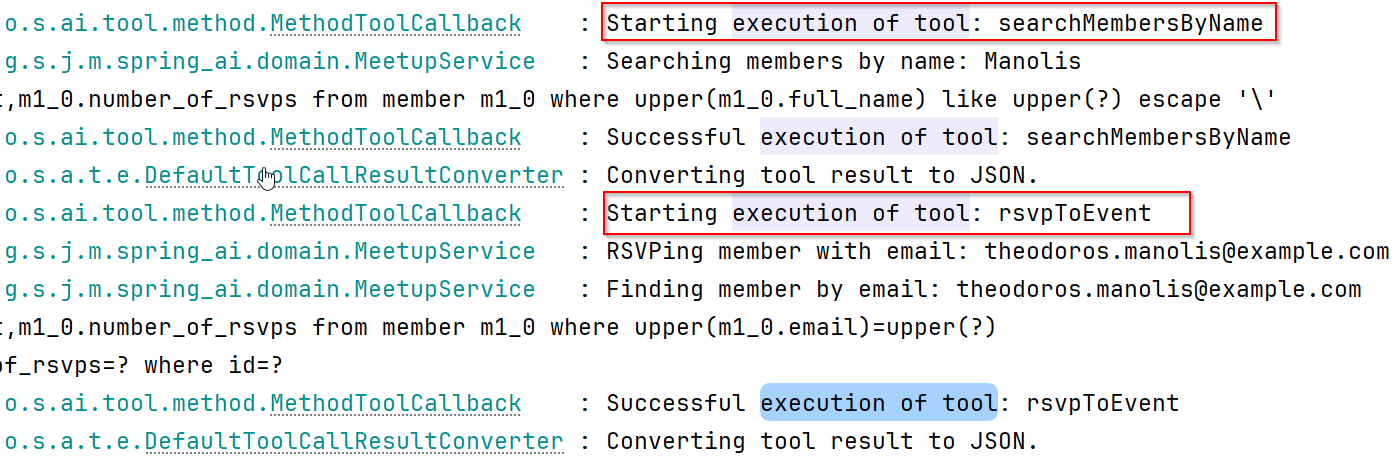
Step 6 MCP Server
MCP (Model Context Protocol) turns your Spring Boot app into a server that any MCP-compatible AI client can discover and use. Three small changes:
docs.spring.io/spring-ai/reference/api/mcp/mcp-overview.html
1. Dependency:
<dependency>
  <groupId>org.springframework.ai</groupId>
  <artifactId>spring-ai-starter-mcp-server-webmvc</artifactId>
</dependency>
2. Configuration:
spring.ai.mcp.server:
  name: skg-java-meetup-mcp
  type: sync
  version: 1.0.0
3. Register tools:
@Bean
ToolCallbackProvider meetupMcpTools(MeetupTools meetupTools) {
   return MethodToolCallbackProvider.builder()
         .toolObjects(meetupTools).build();
}
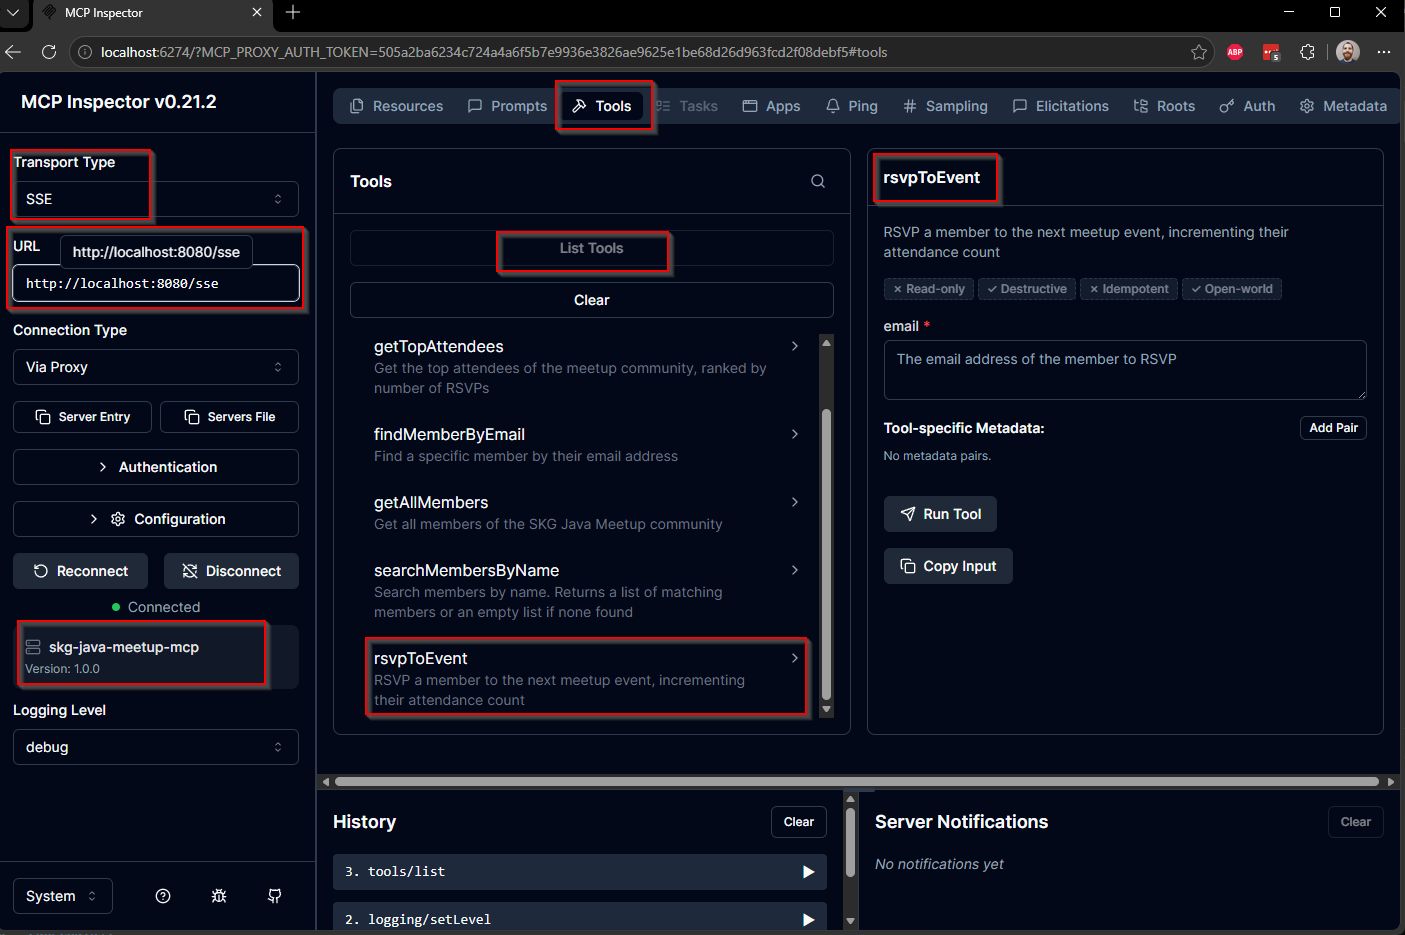
Exploring with MCP Inspector
npx @modelcontextprotocol/inspector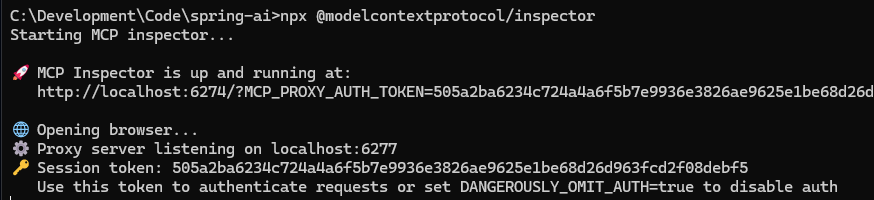
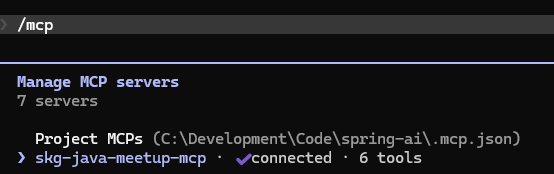
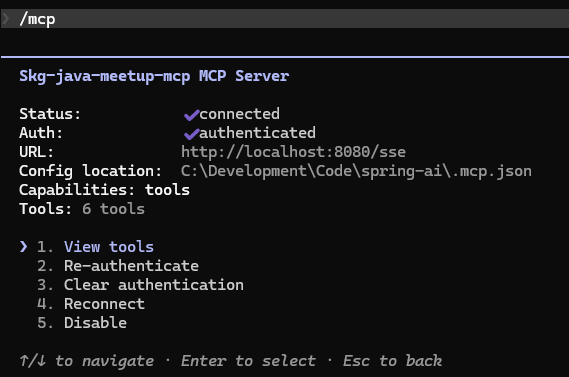
Connecting to Claude Code
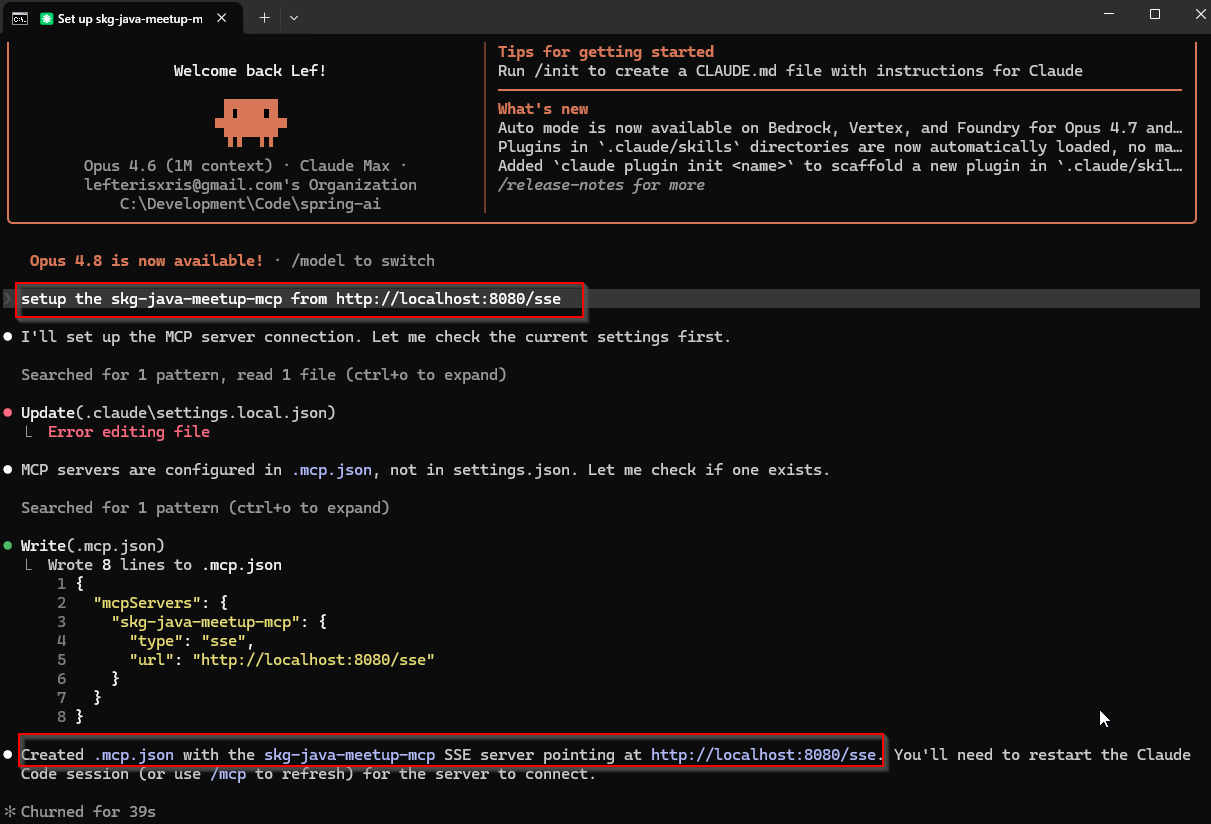
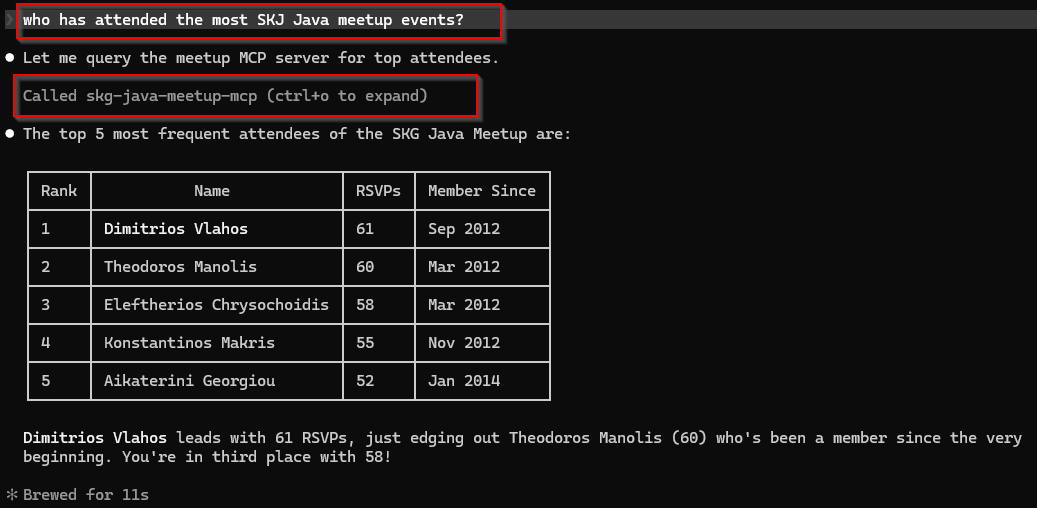
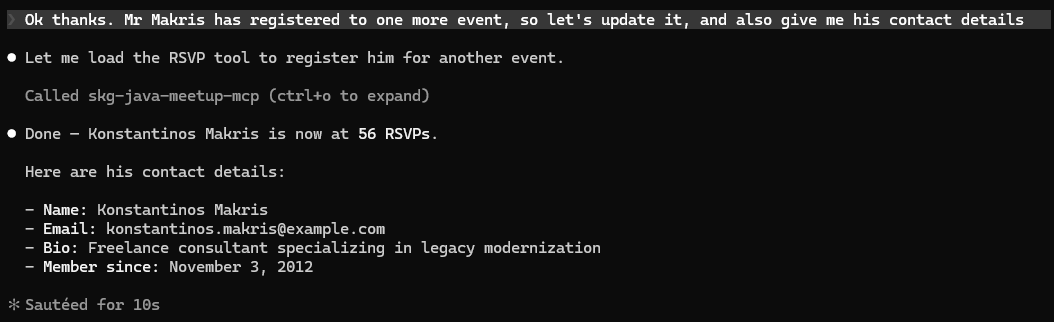
Demo: Claude Code Using Your MCP Tools
Wrap-up
Step 0 - Scaffold
Spring Initializr, project structure, Git init
Step 1 - Chat
ChatClient, system prompt, prompt decoration
Step 2 - Structured
.entity(), Java records as response types
Step 3 - Memory
MessageChatMemoryAdvisor, conversationId
Step 4 - Domain
JPA entities, services, REST endpoints
Step 5 - Tools
@Tool, @ToolParam, AI calling business logic
Step 6 - MCP
Exposing tools to external AI clients
Key Takeaways
- Spring AI makes AI integration feel native - auto-configuration, DI, familiar patterns
- Structured output is trivial - just pass a Java record
- Tool calling is the real power - AI autonomously calls your business logic
- MCP bridges the gap - your app becomes a tool for any AI client
- LLMs don't remember anything - chat memory is conversation replay
The complete source code for this workshop is available on GitHub: LefterisXris/spring-ai-meetup-demo. Clone it, follow along, or use it as a reference for your own projects.
Resources
- Spring AI Official Documentation
- Baeldung Spring AI Guide
- Spring AI OpenAI Chat
- Spring AI Anthropic Chat
- Structured Output Converters
- Tool Calling
- Chat Memory
- MCP Overview
- MCP Inspector
Get Involved
SKG Java Community
Explore · Learn · Engage · Socialize
Our community brings developers together through technical talks, hands-on sessions, networking, and open discussions in a friendly environment.
A big thanks to all our sponsors who have supported our events! We are always looking to welcome new sponsors and collaborators. If your company would like to support our community, host a meetup, or collaborate on events, please reach out to us. Your involvement helps us keep the SKG Java Community active, inclusive, and growing!